It could appear intimidating to put in a stair runner your self, but it surely’s so darn straightforward that we’ve achieved it twice! Thrice in case you depend demonstrating it on live TV (extra on that later). Simply observe the steps in our tutorial under, together with our trick for ensuring your rug is the proper measurement for the undertaking.
Including a rug or runner to your stairs isn’t only a trendy decor alternative that may add coloration, character, or sample. It’s additionally a security function! We discover that including a stair runner cuts down on slips, falls, and even makes it simpler for our canine to traverse them. In addition they soak up sound, that means your much less prone to hear your child clomping up and down the steps. So we extremely suggest including one in case you’ve bought younger youngsters, pets, and even simply clumsy adults round.
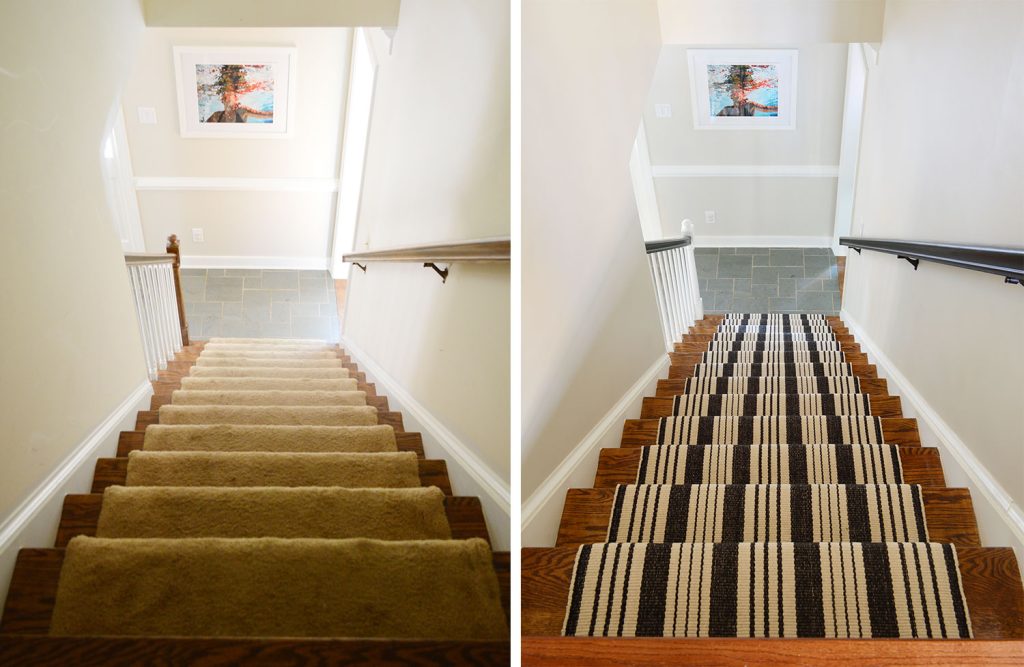
DIY Stair Runner Earlier than & Afters
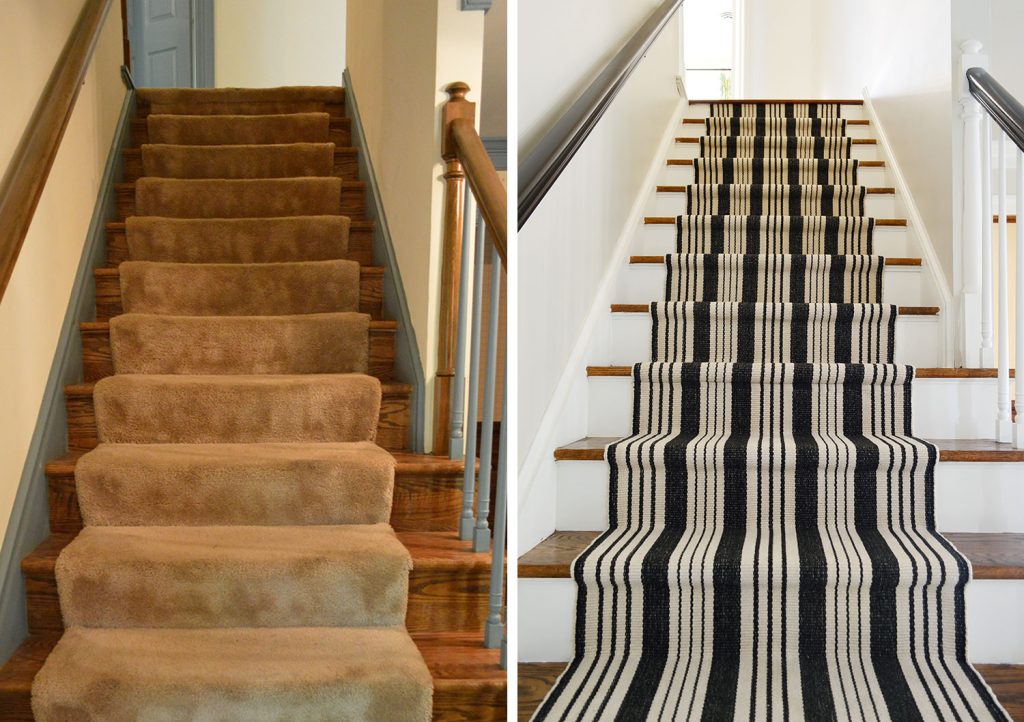
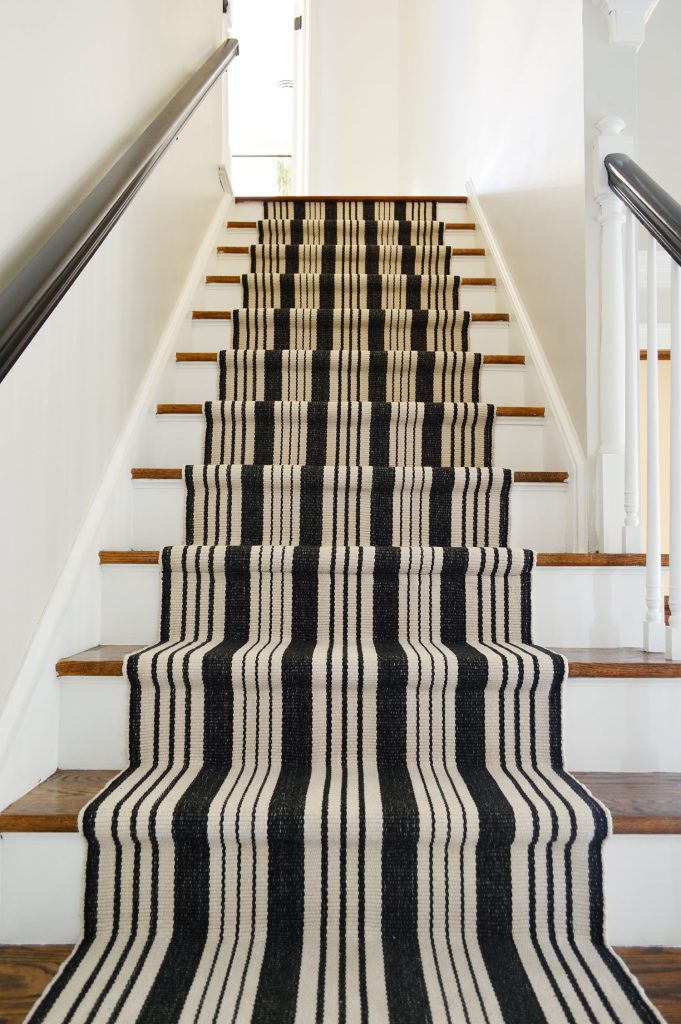
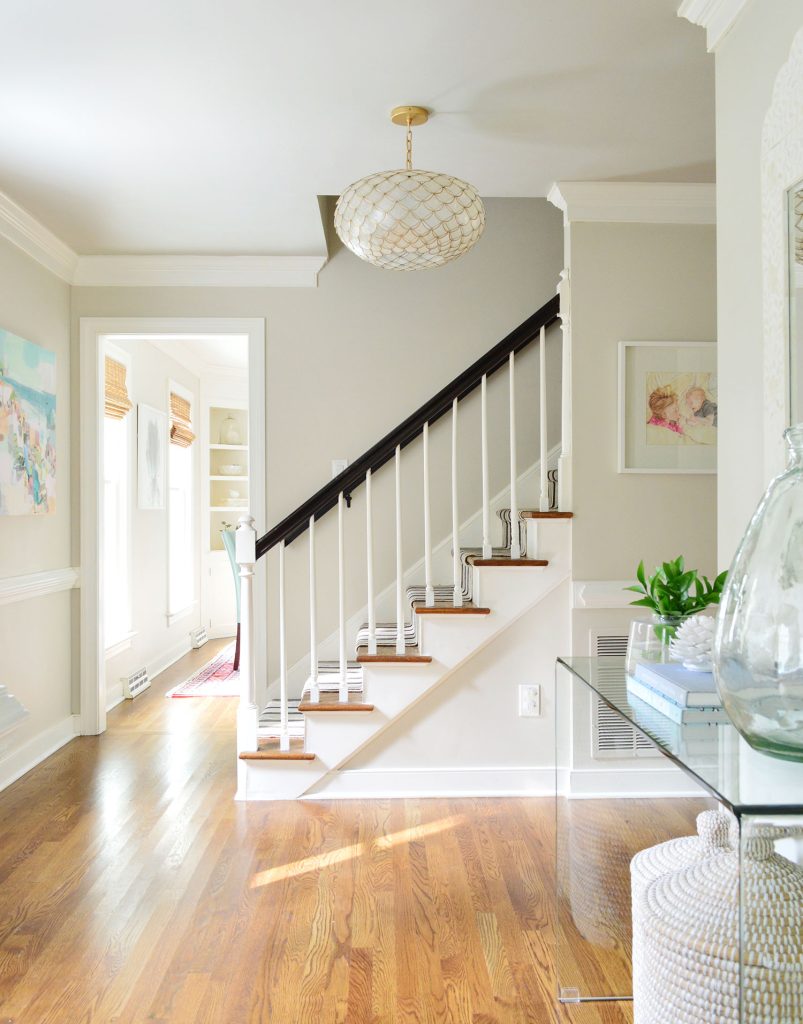
The primary time we put in a stair runner, it was to interchange a dingy carpet runner that got here with the home. You may see within the pictures under that we not solely livened up the steps with a bold striped rug, we additionally modernized the steps by portray the risers, trim, & balusters white and marking the wooden handrails darkish.
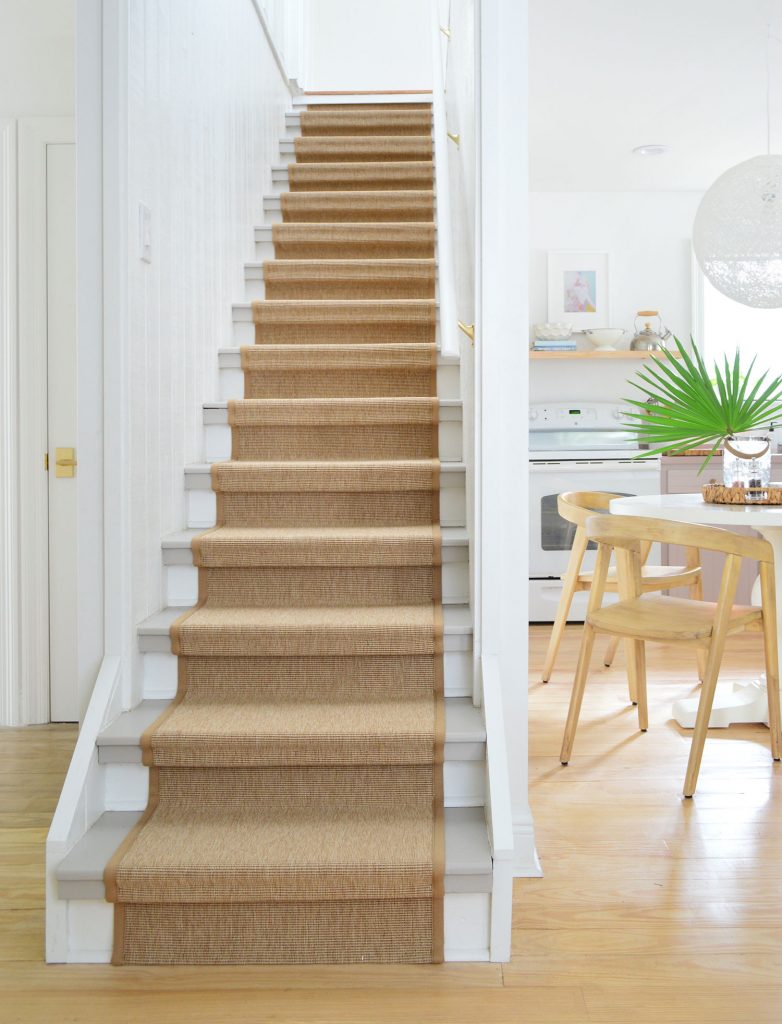
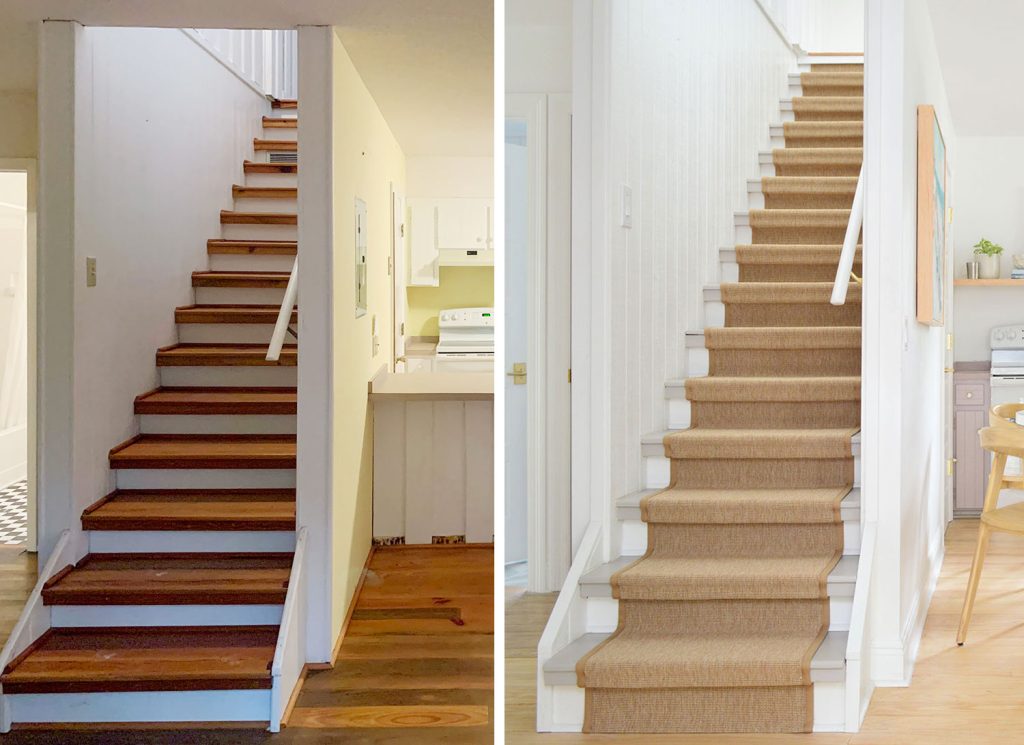
For our second set up, right here in our present residence, we used a beachy sisal runner as a substitute. We additionally painted the treads a cautious grey to brighten them up.
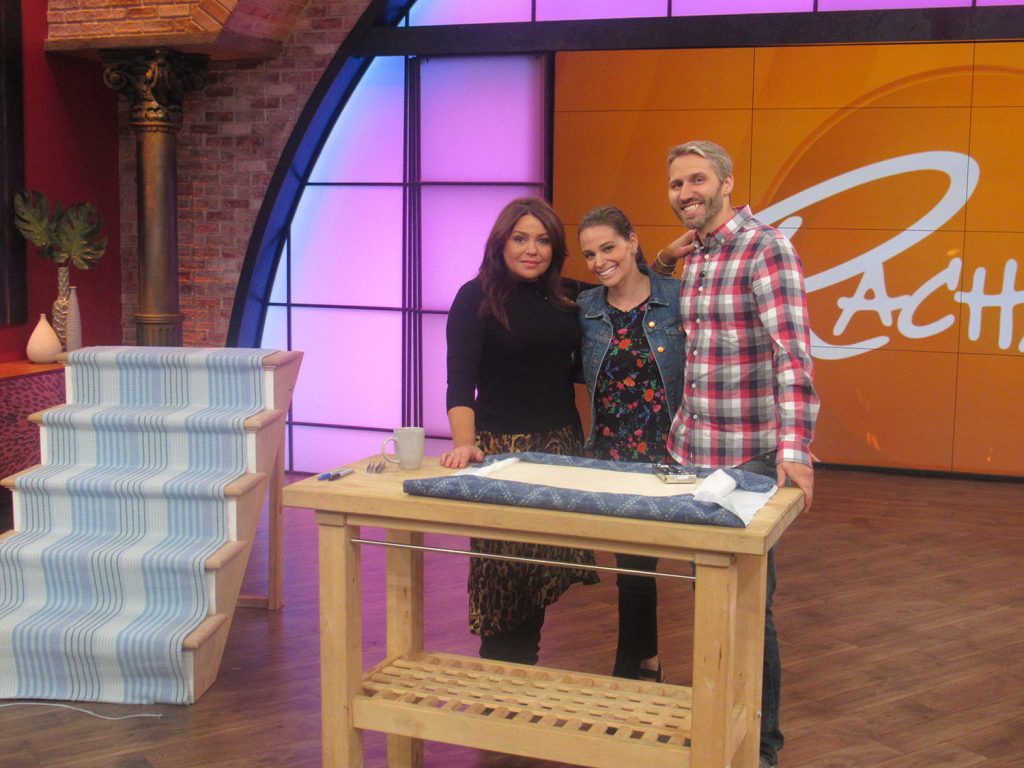
The “third” stair runner we added was for a DIY segment we taped for The Rachael Ray Show. We solely shot about 3 staples on digital camera, however we prepped the small faux staircase backstage. It’s too unhealthy we didn’t get to do a complete staircase. That runner is cute!
Total, you may have numerous methods you’ll be able to customise this undertaking to fit your type and your stairs. So let’s dive into the tutorial!
Instruments, Supplies, & Price
Listed below are the provides and instruments it is best to have useful to put in your individual stair runner:
This doesn’t need to be an costly undertaking both. Our first runner set up value lower than $300! It principally will depend on the runner you select and the way a lot you want.
Steps To Set up A Stair Runner
Our undertaking in whole took us about 20 hours, however that additionally included eradicating the previous runner and portray the risers and railings. The precise stair runner set up solely took about 4 hours, though might depend upon the size of your stairs. We’ll go into every step in additional element, however right here’s an outline of the method:
- Take away your previous runner (if wanted)
- Measure
- Choose a runner
- Paint or stain your stairs (elective)
- Mark your placement
- Minimize the rug pad
- Put together your staples
- Begin on the prime
- Join two runners (if wanted)
- End the underside edge
Step 1: Take away your previous runner
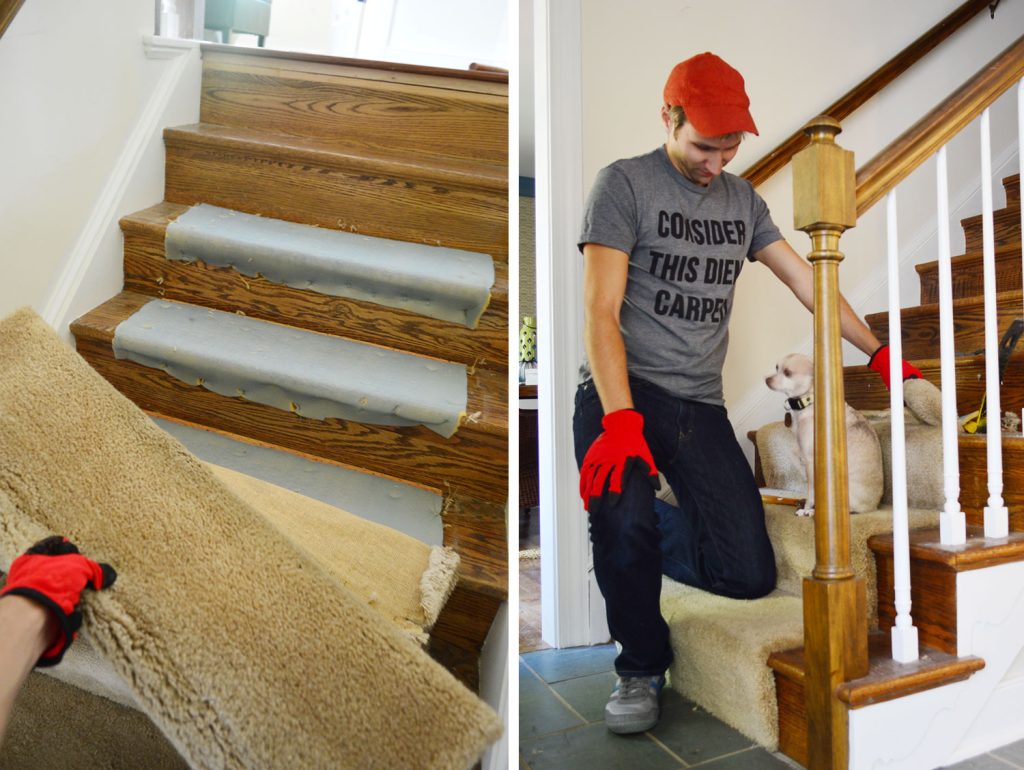
This step solely applies when you’ve got an present rug, runner, or carpet in your stairs that should go. This course of might take time – particularly getting all the previous stapes up! We counted almost 600 staples in our previous carpet. We now have a separate stair runner removal tutorial for this, together with what instruments you’ll need to assist get that previous carpeting off.
Step 2: Measure
Earlier than shopping for your runner, you’ll must measure how a lot you’ll want. As with every rug, the necessary measurements are size and width. Realizing this can even provide help to decide if you should buy a inventory measurement or must order one thing customized.
Measuring runner size
We propose utilizing a string or versatile measuring tape to find out the size of 1 step. This implies riser + tread, together with across the entrance bullnose edge. Multiply this measurement by the variety of steps you may have, after which add 10-15% further. Having an excessive amount of materials is simpler to take care of than not having sufficient!
Measuring runner width
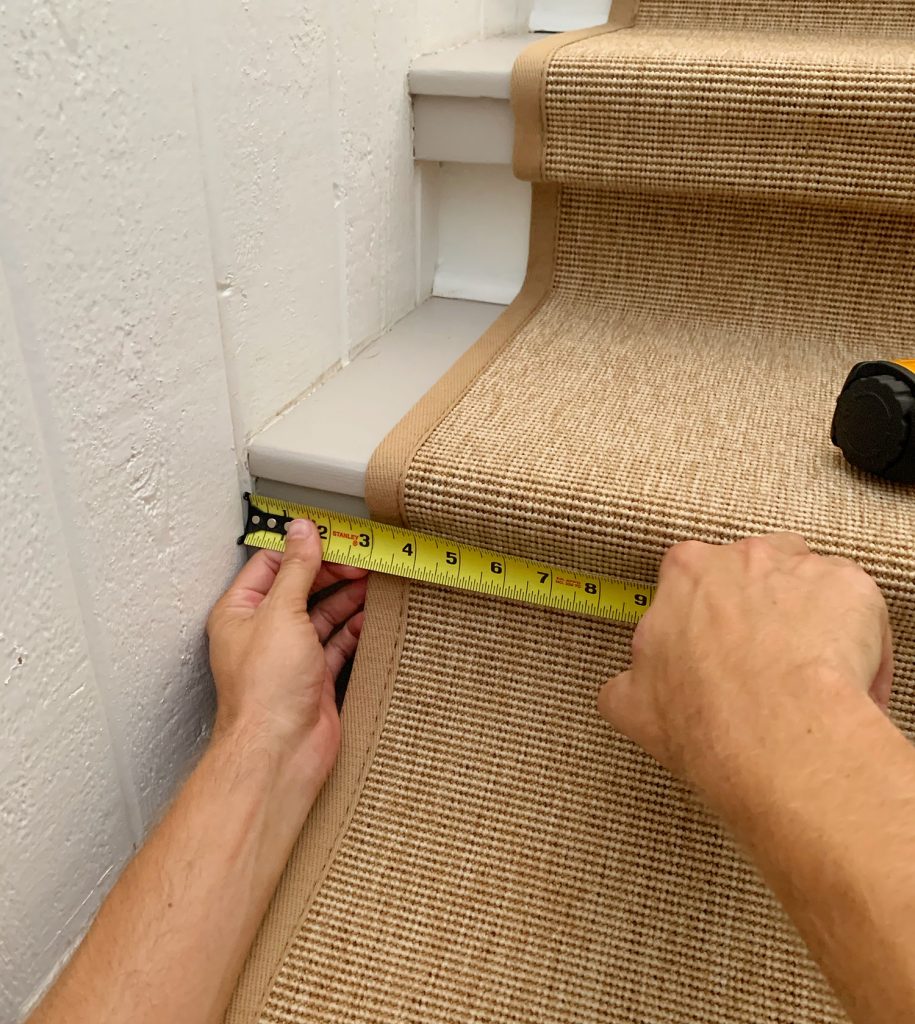
Most stair runners don’t go wall-to-wall. As an alternative, they depart about 2-3″ uncovered on both aspect (see above). This quantity is private choice, and it could be dictated by inventory sizes. Measure the width of your narrowest stair, and subtract 4-6″ to get your runner width. Simply be conscious that many staircases “flare” on the backside, so ensure no matter width you select will match and look good from prime to backside.
Step 3: Choose a runner
Nearly any carpet or rug might be become DIY stair runner. Nevertheless, we propose selecting one thing that can be sturdy and simple to scrub, particularly in case your stairway will get numerous foot site visitors. Indoor/out of doors rugs and pure fiber rugs like wool or cotton are nice for these causes. We additionally recommend one thing low pile, since they’re simpler to maintain clear. We now have used each inventory and customized runners for our stairs.
Utilizing a inventory runner
For our striped runner, we used a rug from Annie Selke (previously Sprint & Albert) as a result of they’re recognized for his or her sturdiness. In addition they have tons of patterns and colours, and most kinds are available in a wide range of sizes. We used two 2.5′ x 8′ Birmingham runners, however they now additionally promote a 20-foot model and as a customizable size. After 7 years of use, we will vouch that it held up nice (other than some fading from solar) and felt fairly delicate underfoot!
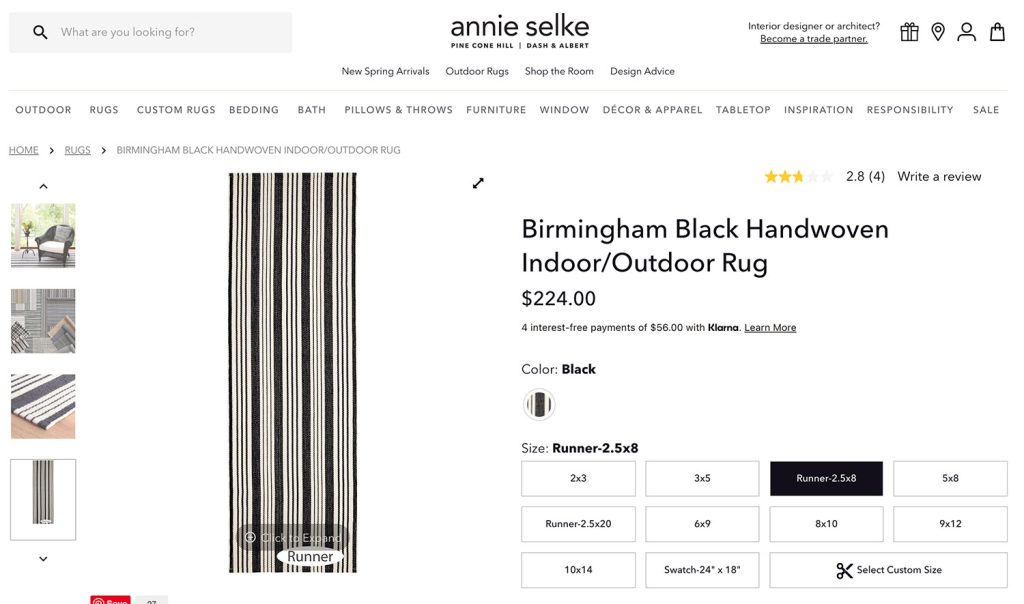
Inventory runners are usually cheaper, however they could require extra ingenuity to suit exactly to your area. Don’t fear – we’ll present you ways!
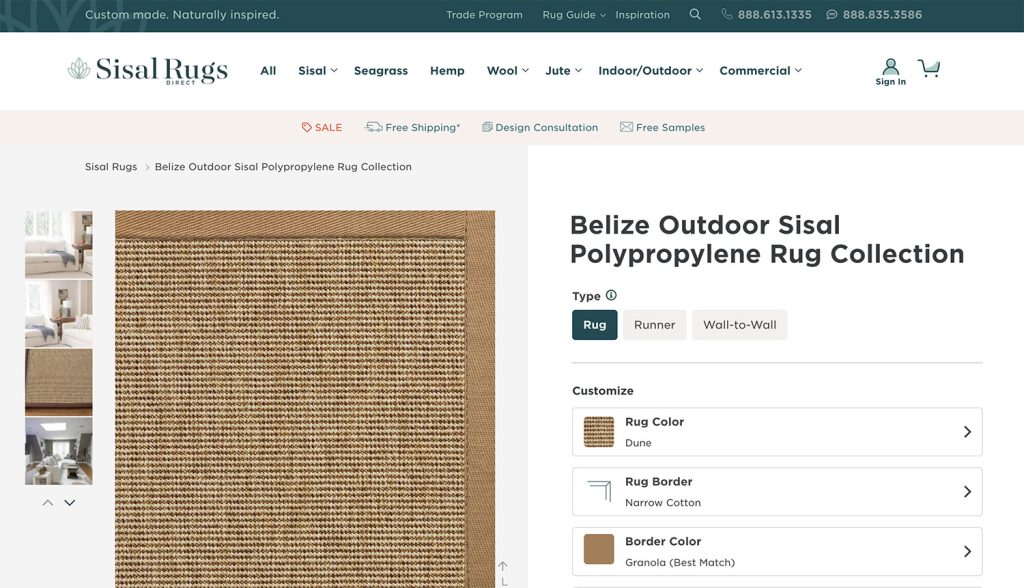
Utilizing a customized runner
For our sisal runner, we ordered a customized out of doors rug from Sisal Rugs. This gave us nice management over the precise look – we picked the colour, border materials, border coloration, measurement, and so on – and solely value us barely about $100 greater than 2 Annie Selke rugs would’ve on the time.
We now have been equally pleased with each forms of rugs we’ve used – inventory vs customized, cotton vs sisal, daring vs impartial – so it is best to be ok with selecting no matter is finest for you.
Step 4: Paint or Stain Your Stairs
In case your stair makeover plans embody any portray, staining, or different probably messy updates: do them now! You don’t need to have to fret about dripping a brand new rug later!
Earlier than we added our striped runner, we stained the handrail a darker coloration and painted the balusters, trim, and risers white. These had been considerably time-consuming duties, so they’re nice to sort out when you’re ready to your rug order to reach.
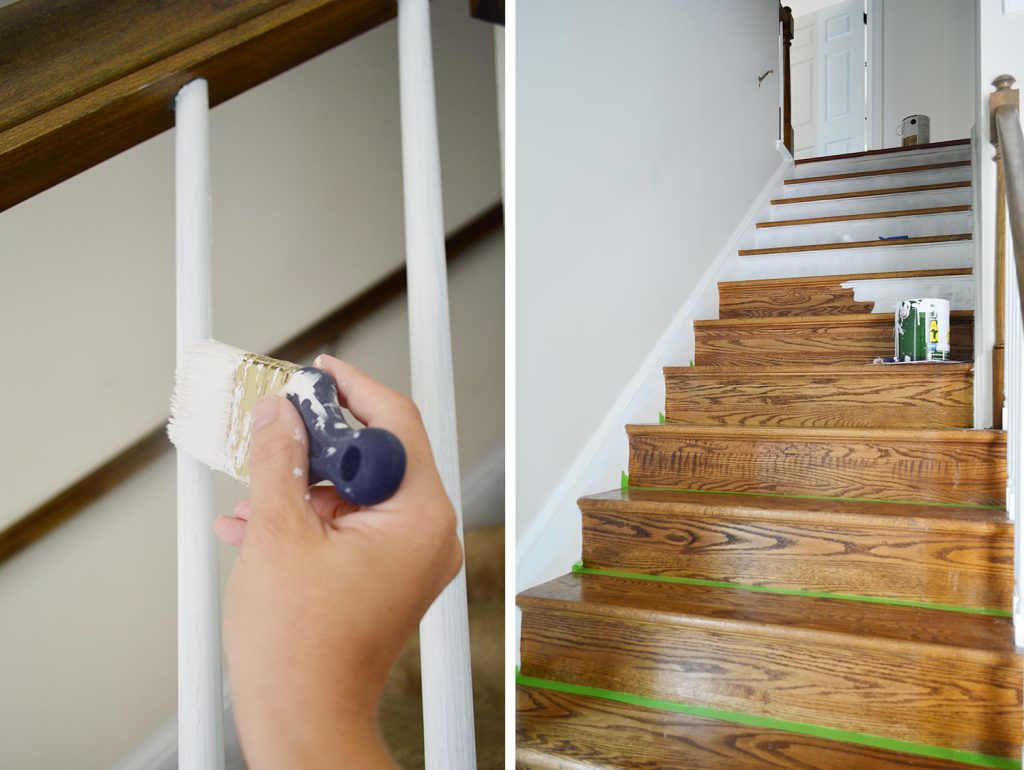
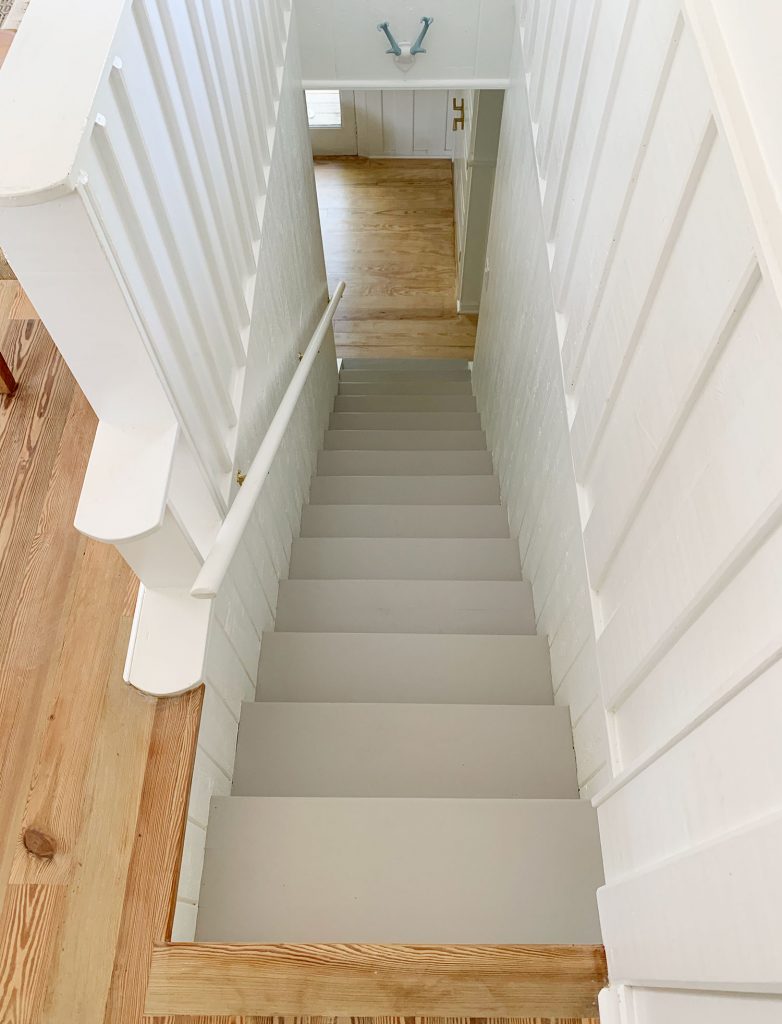
Earlier than including our sisal runner, we determined to color the stair treads a heat grey to cowl up some discoloration within the stain. We used this Porch & Floor Enamel in Requisite Grey by Sherwin-Williams. It didn’t require a primer and has held up nice!
This additionally is a good time to do some other repairs to the steps – like when you’ve got a free or squeaky tread, or want to repair any close by molding.
Step 5: Mark Your Placement
When you’re prepared to put in your runner, begin by marking its placement on each step. This can assist ensure it stays straight and doesn’t drift to the aspect as you put in it. We used a measuring tape and painter’s tape to mark the perimeters alongside every tread, which you’ll be able to see under.
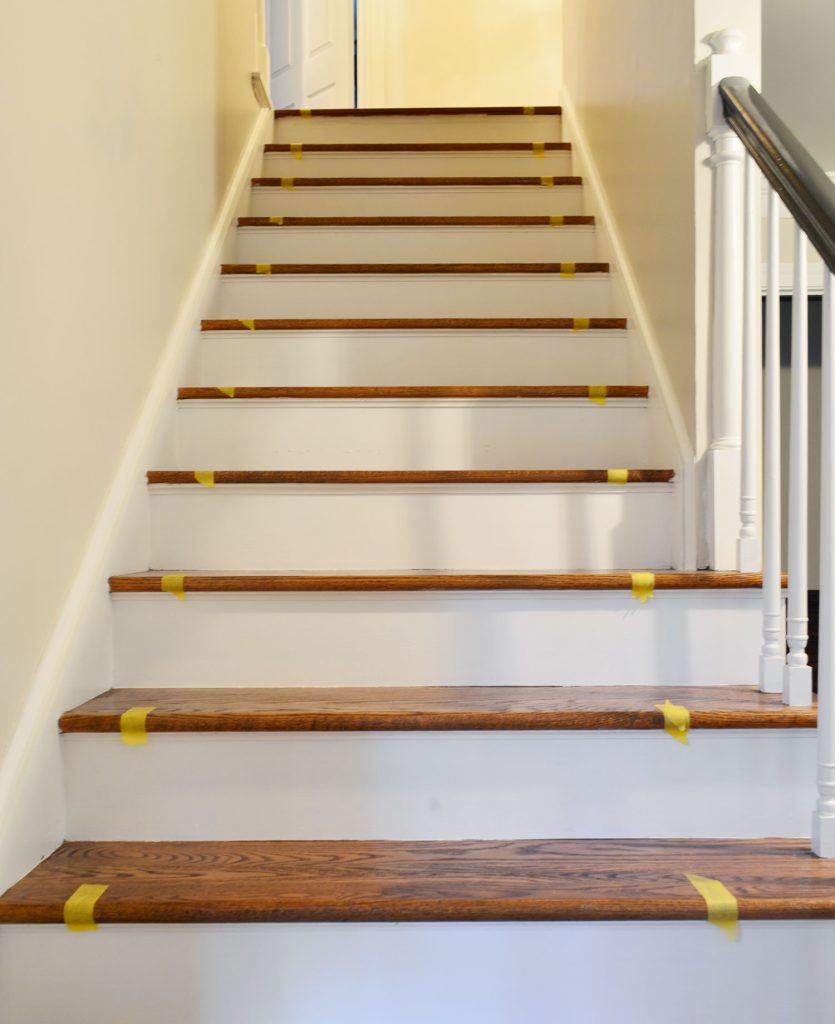
Alternatively, you’ll be able to test your placement with a ruler or measuring tape as you go. We simply discovered it quicker to tape down guides initially of the undertaking.
Step 6: Minimize The Rug Pad
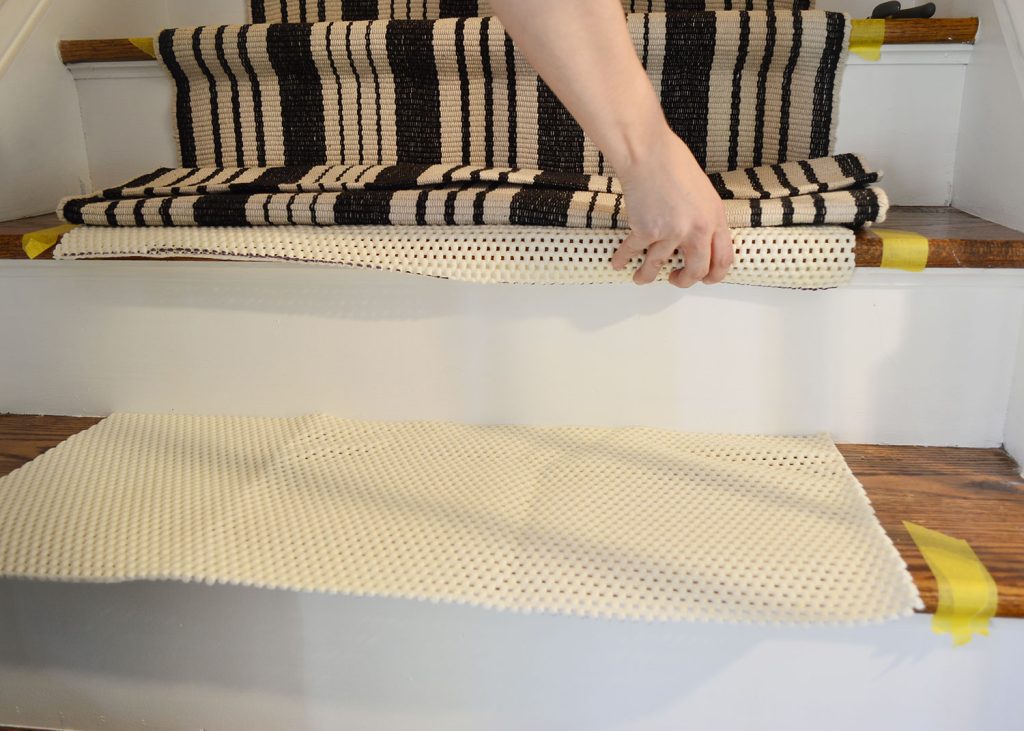
You’ll need a rug pad underneath your runner to (1) present extra cushion and (2) preserve the runner in place. For those who don’t need further cushion, you should use carpet tape as a substitute. We now have used each a felt rug pad and a rubber rug pad with equal success. Simply ensure whichever you select has a non-slip design. Each are bought in a number of sizes, together with runner lengths, and don’t should be very thick (we use 1/8″ depth).

We desire to make use of the rug pad ONLY on the tread floor (not the vertical riser). This protects cash and in addition prevents pointless bulk in opposition to the riser. Nevertheless it does require a while upfront to chop the rug pad into strips. Fortunately they often reduce simply with family scissors. We depart it lengthy sufficient to wrap across the entrance nostril of the stair.
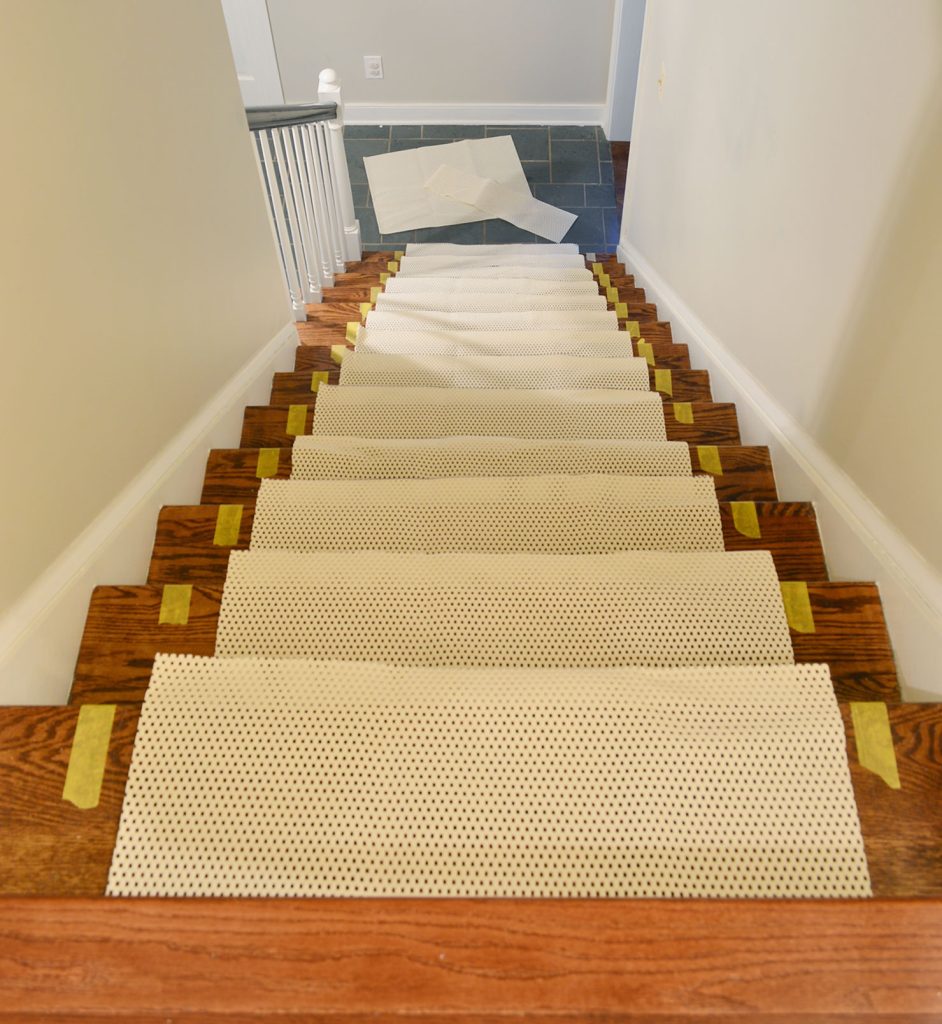
We depart sufficient overhang so the rug pad can wrap across the bullnose of every step, as you’ll be able to inform above.
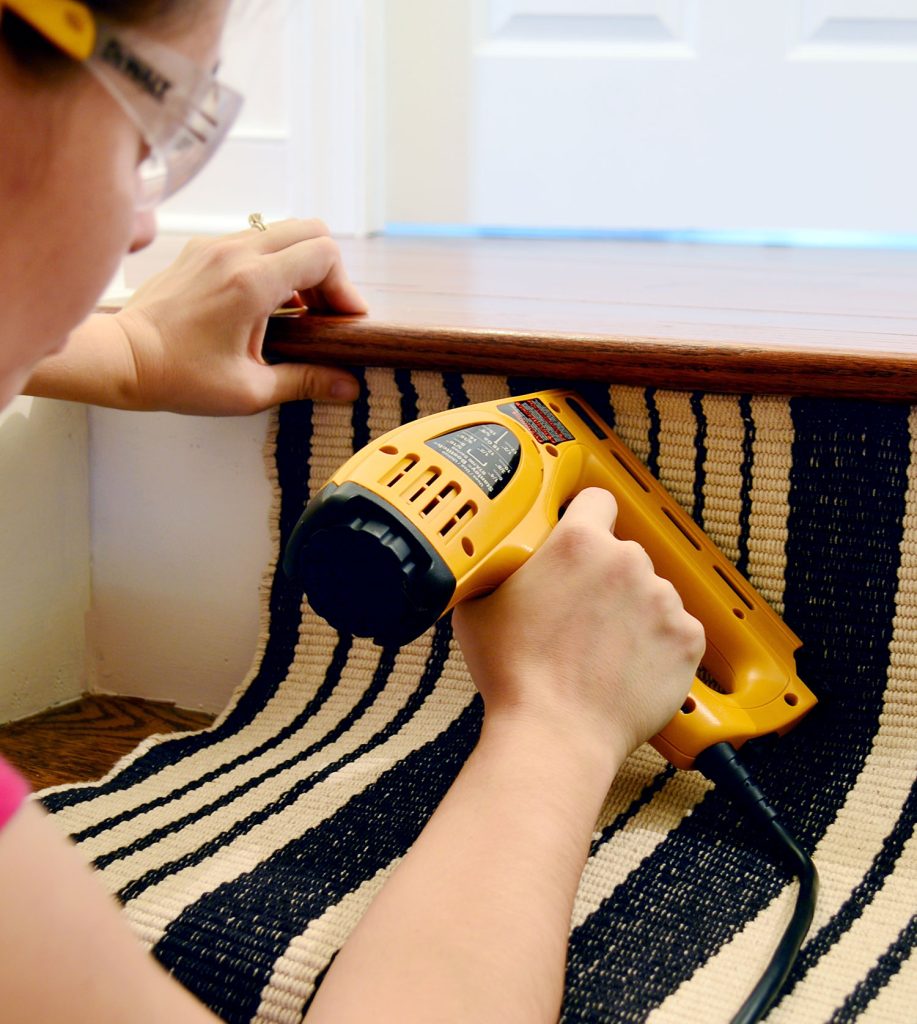
Step 7: Put together Your Staples
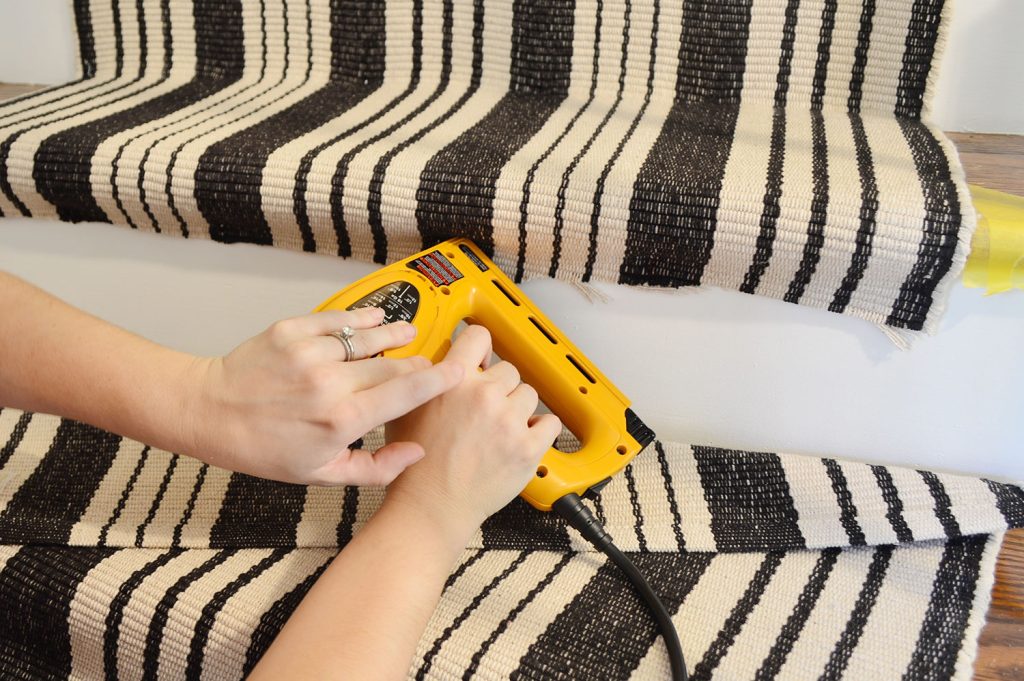
Right here comes the bizarre step, however we promise it’s price it! After some trial and error, we discovered an electric staple gun designed for upholstery initiatives to be the simplest option to safe a stair runner. A hand-powered staple gun was too light-duty. We wanted one thing with extra oomph!
The disadvantage to this method is that your staples could also be seen UNLESS you’re taking the time to paint them first. I do know it sounds bizarre, however belief us. It really works!
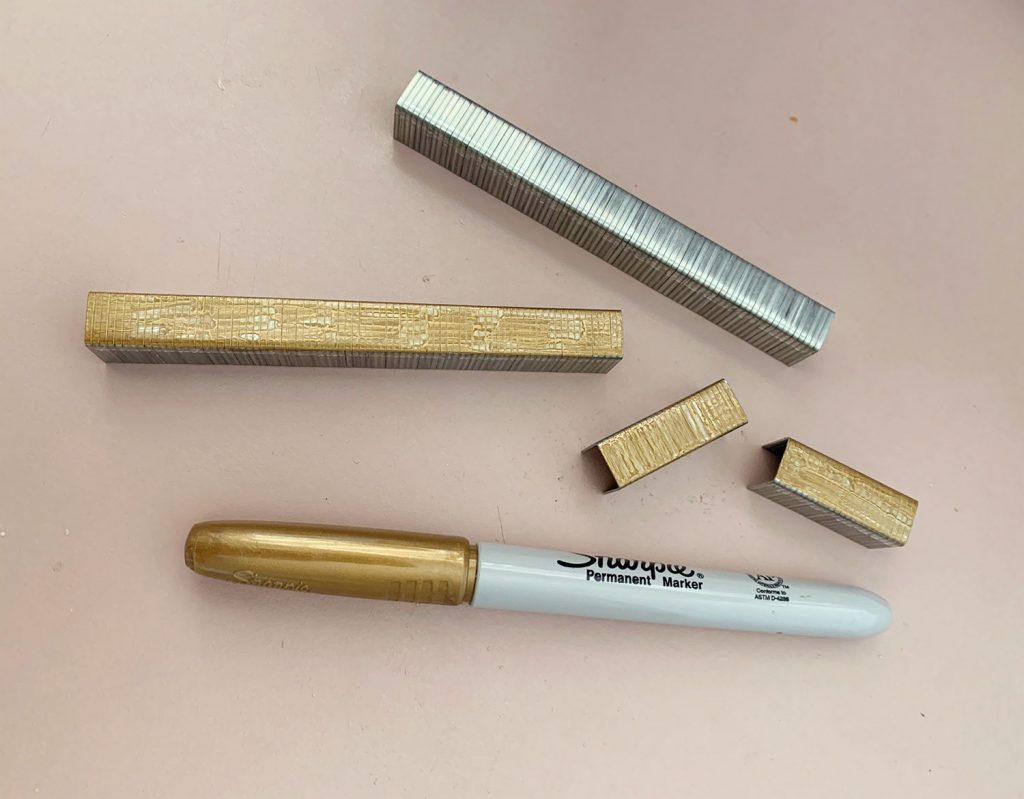
For our sisal runner, we used a gold Sharpie to roughly coloration a strip of staples earlier than loading them into the stapler. For our black and white runner, we did the identical factor with a black Sharpie.

Matching the precise coloration of your rug just isn’t necessary as a result of the principle good thing about this method is that it removes the SHINE of the staples. The staples had been principally seen once they catch the sunshine, so the Sharpie ink dulls them sufficient that they camouflage into the sample of the rug.
Coloring one huge strip of staples earlier than you set them within the stapler is way quicker than doing it individually after they’re caught into your rug. However you’ll be able to check it on a couple of stapled staples first if you wish to decide what coloration provides one of the best disguise.
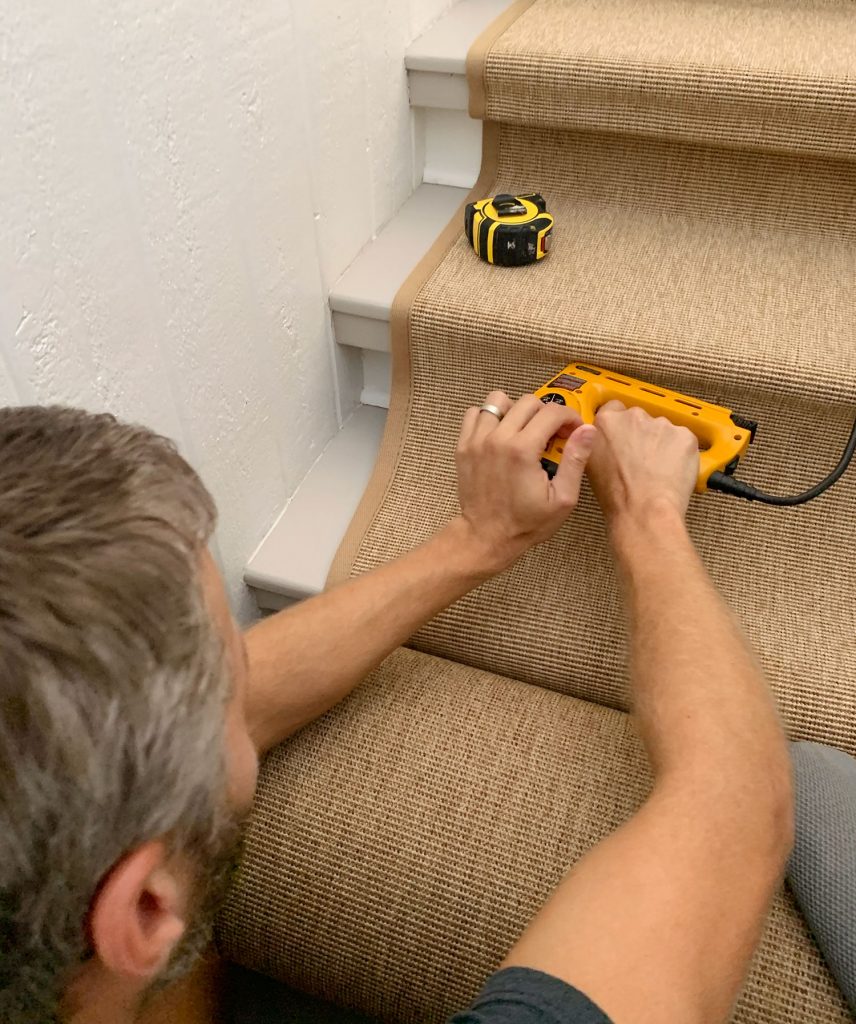
Step 8: Begin At The High
Start stapling your runner underneath the lip on the prime of your staircase. Take your time to place your runner exactly – maintaining the highest edge flush, and your edges aligned together with your tape markings. Use the electric staple gun to safe it at every edge and about 4-5 locations within the center. Your rug’s sample might decide the place finest to position your staples so they’re as hidden as potential. You may as well return and add extra staples later whether it is sagging wherever. The necessary half now’s to only get it hooked up.
With the runner stapled alongside the highest, pull it tight in opposition to the riser and staple alongside the underside into the RISER, not the TREAD. At no level throughout this course of will you’ll want to nail into the treads. This fashion you don’t have to fret about naked ft ever feeling chilly steel.

Subsequent, pull the runner tight alongside the tread and repeat this course of, beginning with one other row of staples underneath the lip of the following tread.
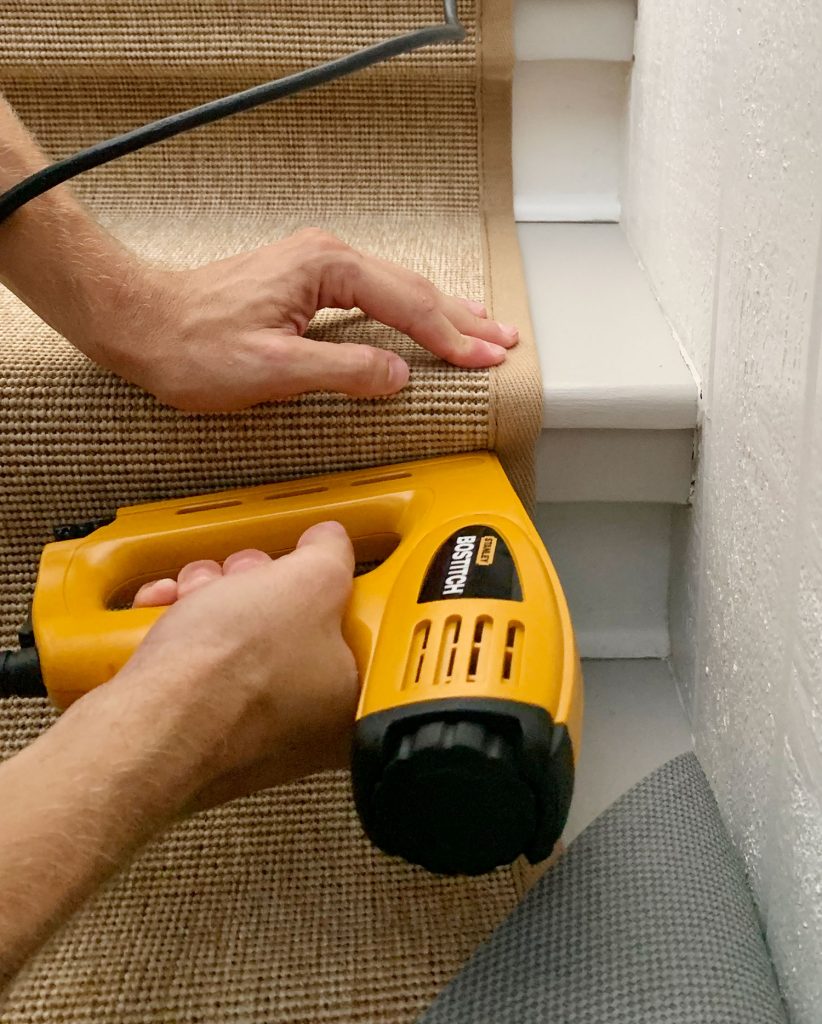
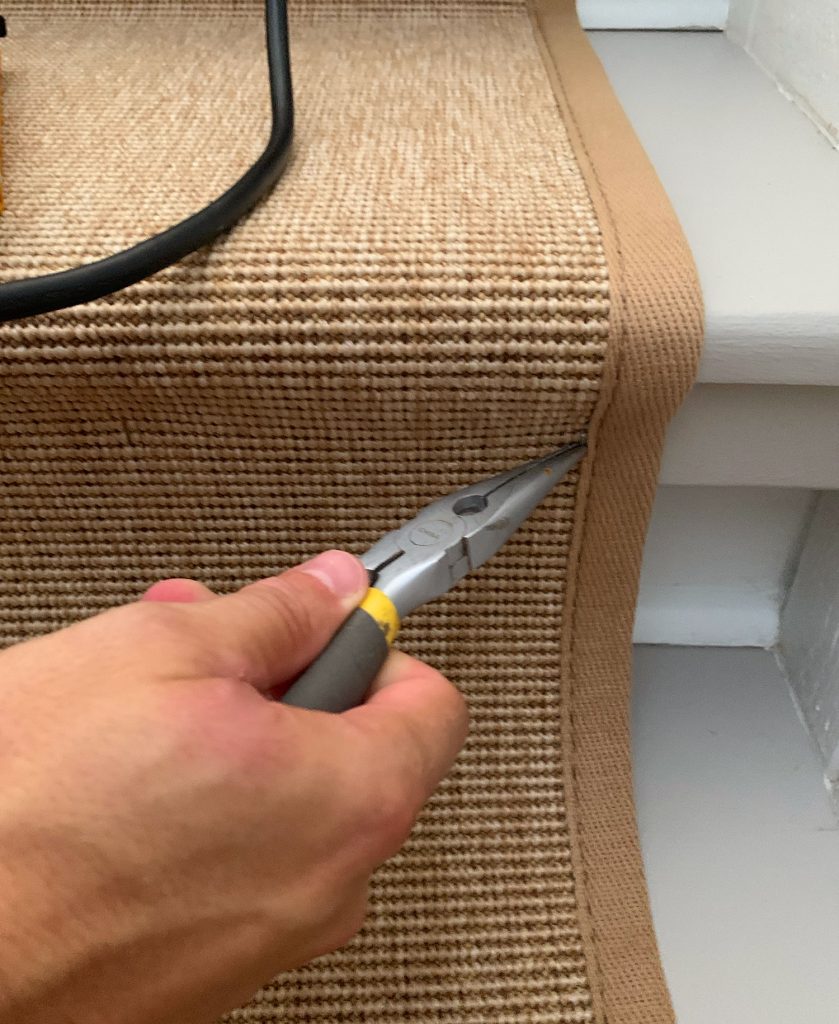
Use your judgment as to the place & what number of staples are wanted to carry your runner tight to the steps. With our sisal runner (above) we had two “lips” underneath every tread, so we needed to do two rows of staples alongside the highest of every step. Additionally, don’t fret if you’ll want to take away a misfired staple every now and then. Simply preserve some needlenose pliers useful.
Proceed this course of, working down your stairs in direction of the underside. Simply keep in mind to maintain pulling your runner tight and ensure it’s not drifting to at least one aspect as you go. Oh, and don’t neglect to place down your rug pad strips as you go.
Additionally, we discover the electrical staple gun works finest once you apply stress to the again of it as you fireplace. This helps the staples sink deeper into the swood.
Step 9: Join Two Runners
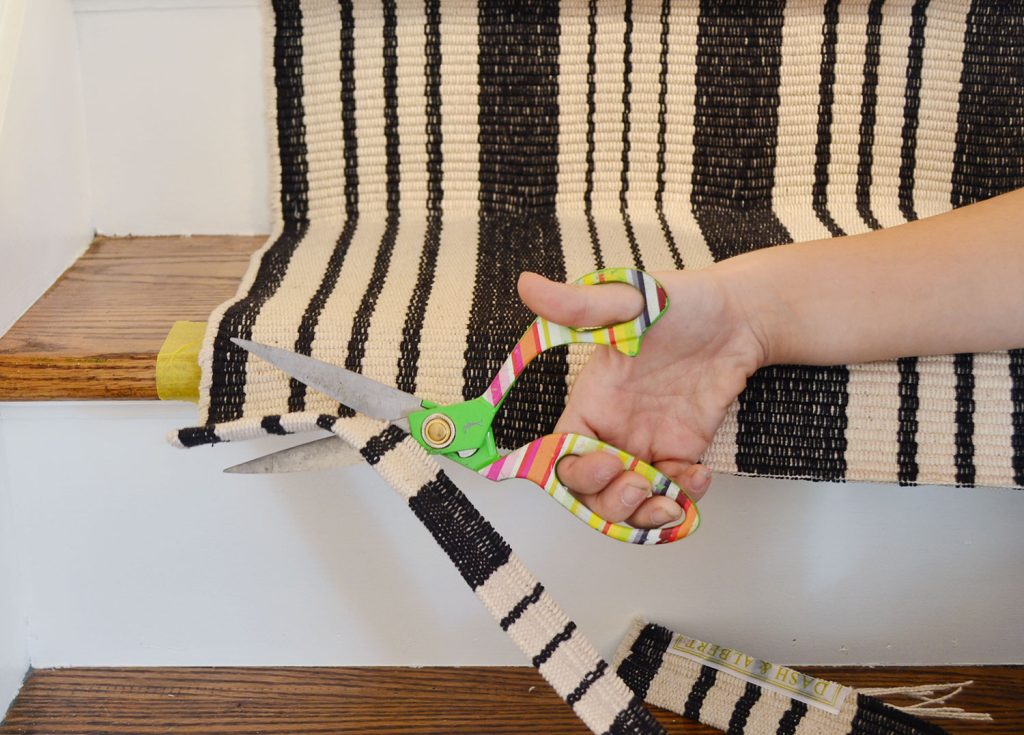
If one runner gained’t attain the underside of your stairs, it’s straightforward to seamlessly join two separate runners. The easiest way to do that is to cover the transition underneath the lip of a tread. Use scissors to chop off any further materials out of your first runner in order that it terminates underneath the lip.
Staple that reduce finish proper underneath the bullnose fringe of the tread, simply as you may have been doing.
Then connect the second runner underneath the lip, identical to you probably did with the primary runner on the prime of your stairs. From there, you’ll be able to proceed down your stairs with the second runner. Here’s a completed image of our stairs. Can you discover the spot the place one runner ends and the opposite begins?
You may kinda see it there about 3 steps up. The transition just isn’t 100% undetectable, but it surely’s so refined you solely actually discover it in case you’re searching for it.
Step 9: End The Backside Edge
When you get to the underside, use scissors to chop off any extra materials – leaving about an additional inch of fabric. Fold this further bit again underneath the runner and staple it into the underside of the rise. This fold provides a cleaner, even edge on the underside (since some runners will fray barely when reduce).
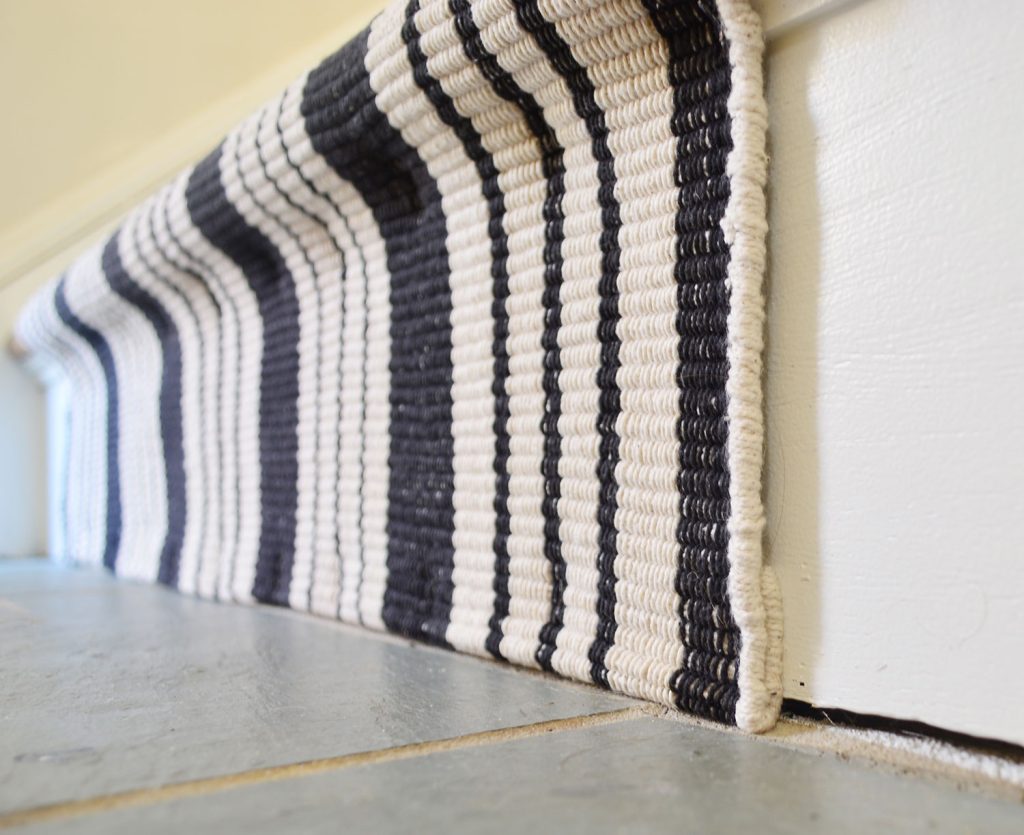
And identical to that, you’ve completed your stair runner set up!
You may learn extra specifics about installing our sisal stair runner, and see extra earlier than & after photos of that area.
Stair Runner FAQs
Listed below are solutions to different questions we steadily get about putting in a stair runner.
How effectively do stair runners maintain up?
Our stair runners have held up very effectively, even with busy youngsters & pets in the home. Like all rug or carpet, they require common vacuuming and the occasional stain elimination. However so long as you select a sturdy materials like an indoor/out of doors polypropylene rug or a pure fiber rug, it is best to have little hassle. We lived with our striper runner for over 7 years earlier than shifting, and we solely skilled mild fading on the backside (the place it bought numerous daylight) and a few small, however barely noticeable, fraying on the nostril of a step or two.
Do stair runners harm the steps?
Whenever you set up a stair runner, you’ll put small staple holes in your stair risers. A stair runner additionally might trigger your paint or stain end to fade erratically, because of the steps being partially lined. Nevertheless, each of those might be remedied with wooden putty and a recent coat of paint or stain.
What are some great benefits of a stair runner?
Along with enhancing the look of your stairs, you’re additionally making your steps safer and quieter once you set up a stair runner. Rugs soak up sound and reduce down on the noise of loud footsteps. In addition they are much less slick than wooden steps, which makes slips and falls much less frequent.
How do stair runners keep in place?
Stair runners keep in place due to a mix of staples and rug pads. The staples maintain the rug tight to every riser, serving to it kind to the form of the staircase. Rug pads underneath the tread preserve it from shifting underfoot. Alternatively, you should use stair carpet rods to carry the rug tight to the riser.
What are alternate options to a stair runner?
In our historic seaside residence, we didn’t need to set up a everlasting stair runner. We used two alternate options to assist our canine not slip on the steps. On our entrance steps, we used non-slip sisal treads held in place with carpet tape. On our again stairs, we used clear non-slip treads for a virtually invisible look.
*This put up accommodates affiliate hyperlinks, so we might earn a small fee once you make a purchase order by means of hyperlinks on our website at no further value to you.


