We simply put in roughly a million curtain rods at our duplex (okay, truly simply 16 of them) so we wished to share a easy trick we used to hurry up set up, whereas nonetheless retaining the whole lot wanting stage and equally spaced. This could take a number of the headache out of hanging new curtains, particularly should you’re doing a couple of window in your room. Plus, the trick is completely free!
For this set up, we’re utilizing inexpensive curtain rods like these that you would be able to get at most massive field shops and these ring clips. We are also hanging easy $14 white Ikea curtain panels utilizing this trick for making Ikea curtains look expensive. Collectively, the following pointers saved us a whole bunch of {dollars} throughout the entire home!
Earlier than we speak about HOW to put in your curtain rods, let’s speak about precisely WHERE to place them. Right here’s some fast curtain fundamentals:
How HIGH Ought to You Cling Curtain Rods?
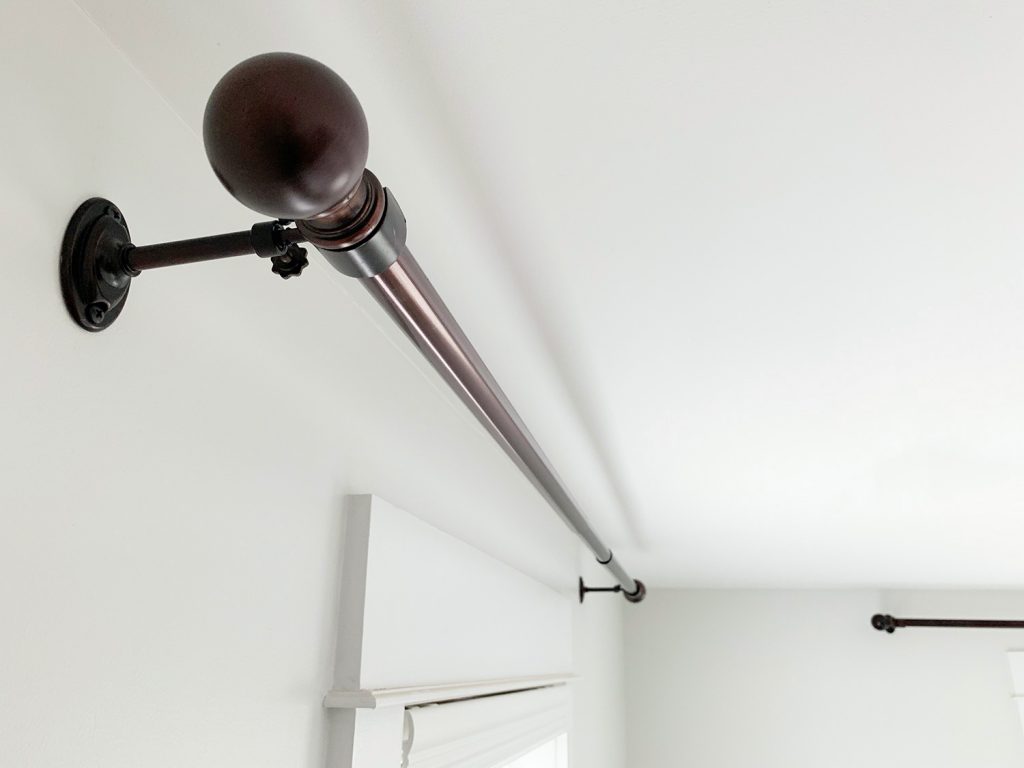
There’s no agency rule for this, however most individuals agree that curtains look greatest after they’re hung (say it with me!) HIGH AND WIDE. As in, greater and wider than the window itself. This not solely creates the phantasm of an even bigger, grander window, nevertheless it additionally makes your room really feel taller and attracts the attention up. The under has 9ft ceilings, and you may see how good it’s for the window trim to get to breathe a little bit, and for the attention to comply with the curtains from ground to almost-ceiling.

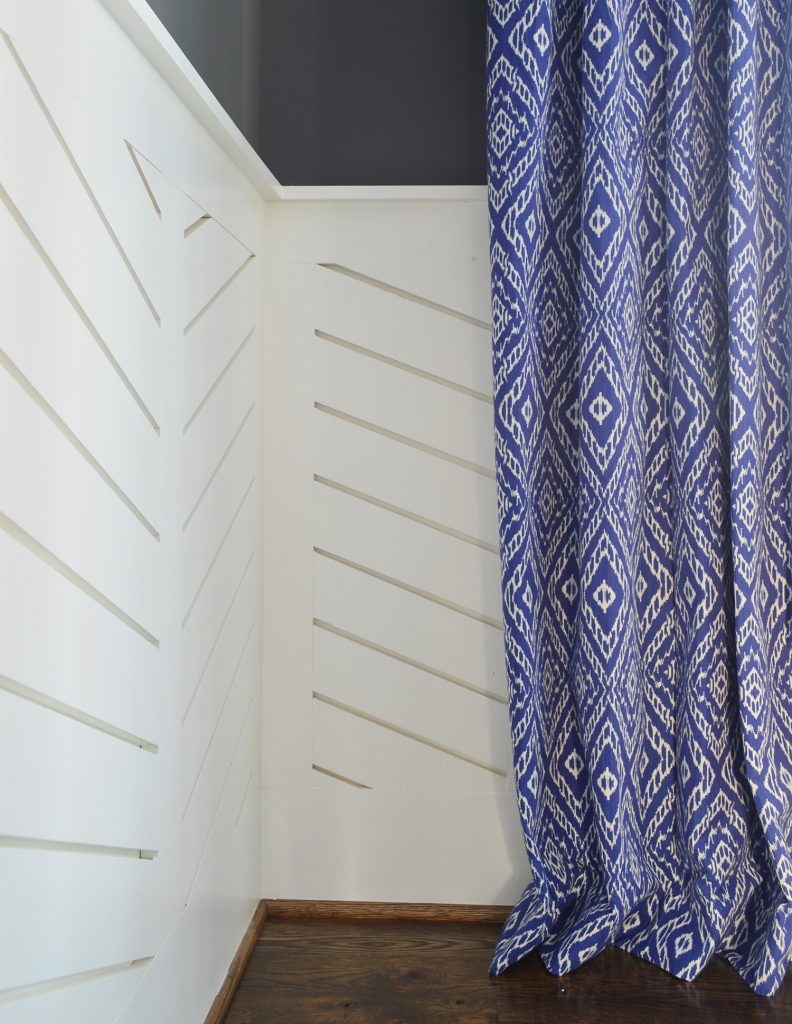
Talking of the ground, most consultants say that your curtains ought to often contact or practically contact the ground itself. Some like them to hover barely above the bottom, others love a dramatic pool of material on the backside. We sometimes like them to graze the ground ever so barely – like under in our showhouse’s dining room. We discover this helps maintain them in place higher.
The exact placement of your rod is determined by a couple of components (ceiling peak, curtain size, trim & molding model, and so on) so I can’t provide you with a tough and quick measurement for the place your rod ought to all the time go… however typically, we like
However the vital factor to notice is that we’re hanging them in relation to the ceiling, NOT the window. It’s the belief that your curtains must relate to the window that causes lots of people to hold their curtains too low.
That being stated, generally the window trim is de facto near the crown or ceiling and you could not have 3-4″ inches of area to work with, like you may see within the photograph under.

Additionally, any tremendous tall rooms or areas with sloped ceilings are particular circumstances the place you’ll should make a judgment name and you could not have the ability to decide your curtain rod peak in relation to the ceiling.

Finally, our favourite approach to verify the right curtain peak is to carry half of the rod up and have another person step again to double-check that it seems to be good. You are able to do this with only one curtain panel connected (after you’ve washed, ironed, and done whatever else may change the peak of your panel – aside from hemming, that ought to occur as soon as they’re hung so you may get the right size).
How WIDE Ought to You Cling Curtains?
This additionally is determined by a number of components, just like the window dimension, what else is on the wall (particularly if there are OTHER home windows close by), and the way tight or unfastened you need your panels to look. Typically, we like to put the rod hooks about 8-11″ from the outer fringe of the window trim.
By barely overlaying the sides of the home windows you create the phantasm that the home windows are wider than they are surely. In different phrases: THE CURTAIN PANELS ARE HANGING IN FRONT OF THE WALL NEXT TO THE WINDOW – NOT IN FRONT OF THE WINDOW (which makes it look smaller and blocks gentle). Sorry for shouting, nevertheless it makes such an loopy good distinction.

If the 2 home windows are nearer collectively (like in our bed room under) you will have to cheat your rod nearer than that 8-11″ distance from the window trim. Conversely, we would grasp the curtains even wider if we’re making an attempt to fill a big wall area.

You possibly can even grasp the rod wider on one aspect than the opposite if we’re making an attempt to make a window look much less off-center (extra on that here – it may make all of the distinction!). So it truly is versatile.
Our Straightforward Curtain Hanging Trick (On Video)
Figuring out the width (your required distance from the window trim) and peak (your required distance from the ceiling) is what makes this simple trick potential. John demonstrates all of it on this video under (additionally look ahead to my tremendous cool footwear cameo). There are extra pictures after the video, however I’d strongly suggest coming again to view it when you may.
NOTE: You may as well watch it here on YouTube.
Instruments & Supplies Wanted
Aside out of your curtain rod and the included hanging {hardware} (brackets, screws, wall anchors), there are only a few objects you’ll want to hold it rapidly:
- Power drill
- Small drill bit (like 3/32″) to make pilot holes
- Bigger drill bit (like 3/16″) to make wall anchor gap
- Tape measure or ruler
- Pen or pencil
- Scrap cardboard sheet (just like the one which got here together with your curtain panels)
- Stool or stepladder
Methods to Cling Curtain Rods
Right here’s a fast overview of the steps we’ll cowl:
- Decide measurements
- Make a cardboard template
- Drill pilot holes
- Drill bigger holes & add anchors
- Set up curtain brackets
- Add rod & curtain panels
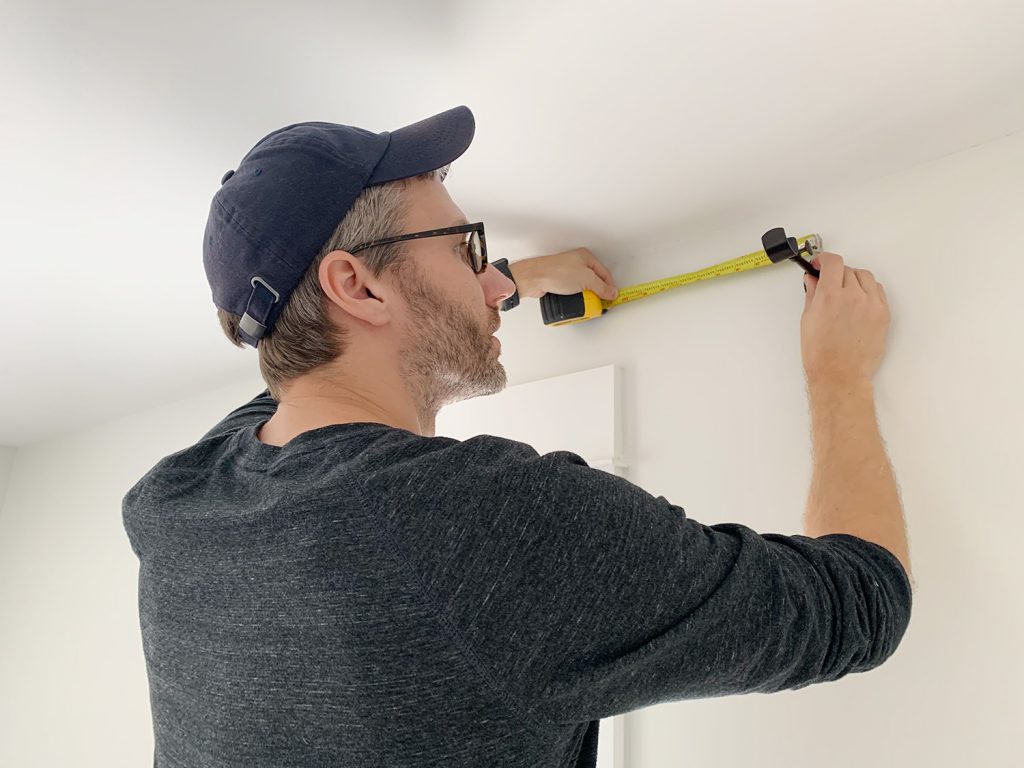
Step 1: Decide Your Measurements
We held up one curtain panel on the rod to finalize what spot regarded greatest after which held the curtain rod bracket in place to take measurements. Utilizing a tape measure, we decided that we wished to put our curtain rods 10.5″ from the surface of the window body (weirdly particular, I do know) and three″ down from the ceiling. These are our measurements to the highest screw gap within the rod bracket since we discover it best to work with the measurements of the place you’ll truly must drill.
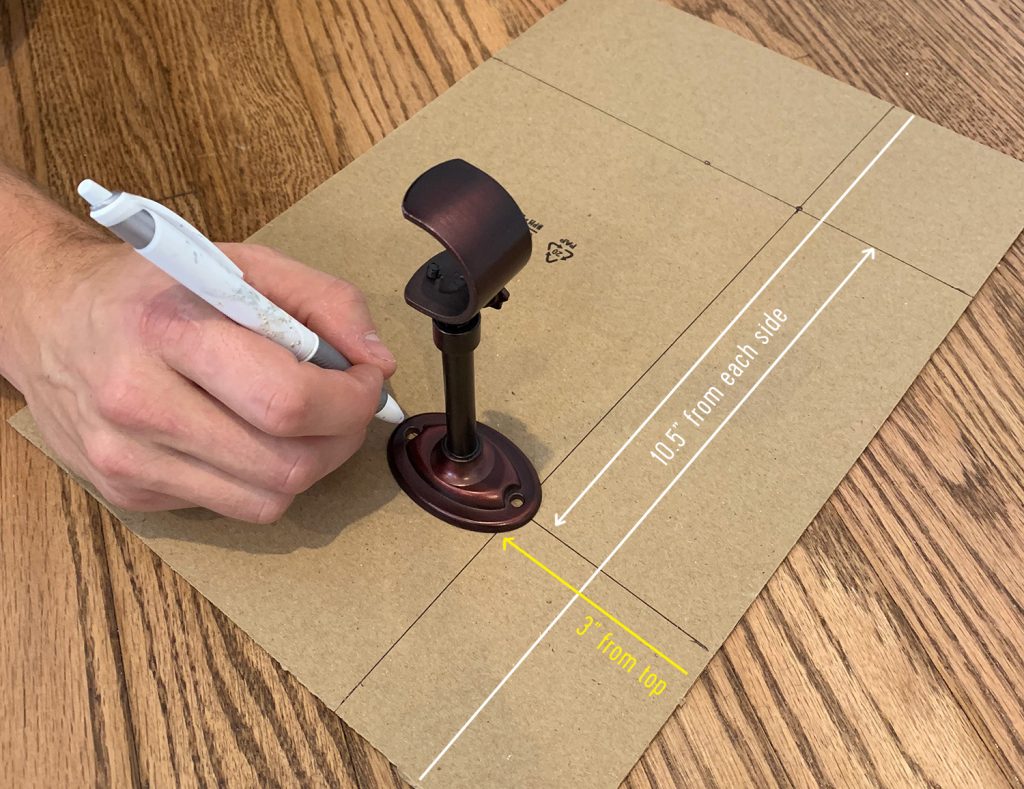
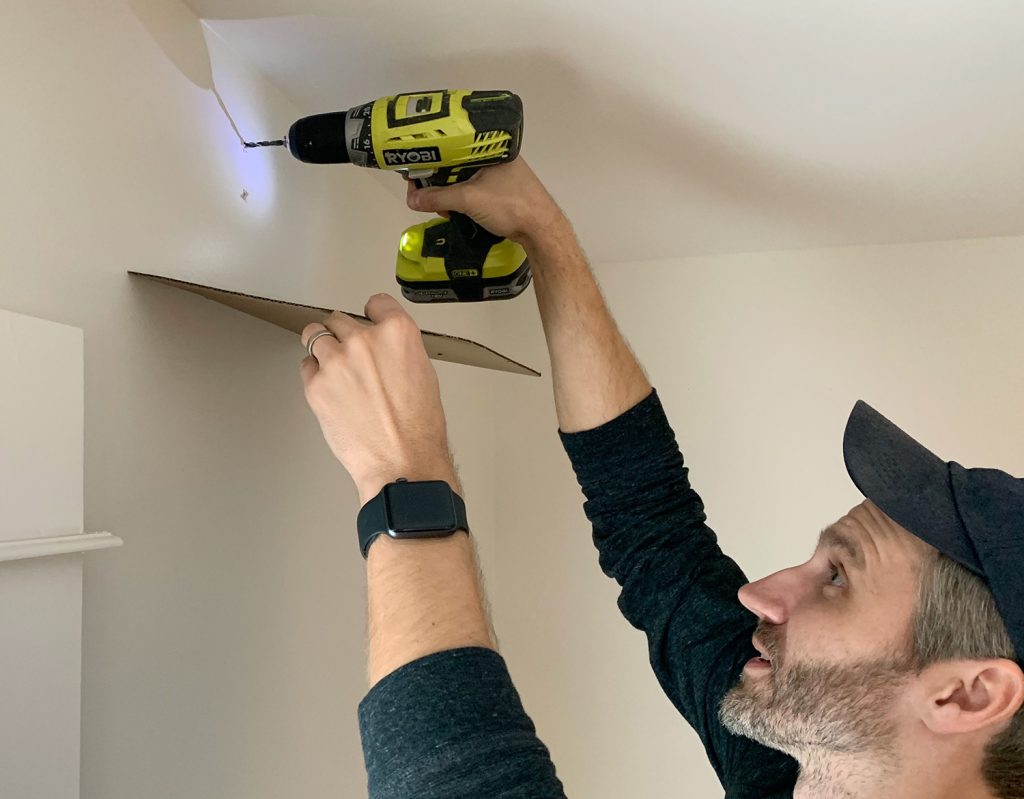
Step 2: Make A Cardboard Template
We used a scrap piece of cardboard to make our template – marking 10.5″ from either side (see white arrows) and three″ down from the highest (yellow space). This was truly the cardboard that got here within the curtain bundle, so that you might need one thing prefer it readily available already! As soon as we marked our traces, we lined up the curtain rod hook and marked the 2 screw holes on BOTH 10.5″ marks.
Step 3. Drill Pilot Holes
Load up your power drill with a small pilot gap bit (we used a 3/32″ bit) and maintain your template above your window with the prime edge flush to the ceiling and the aspect edge lined up with the surface fringe of the window body. Then you may simply drill small pilot holes by means of your two template marks.

A observe about retaining issues
Fast Tip: Dealing With Sloped Ceilings
Bought sloped ceilings? Don’t panic! While you’re hanging the rod near your ceiling, you truly need the rod to comply with any slope within the ceiling! Will probably be your eyes’ closest reference level for a straight line, so it’s going to probably seem stage even when it isn’t. That’s why a stage isn’t required for this course of.

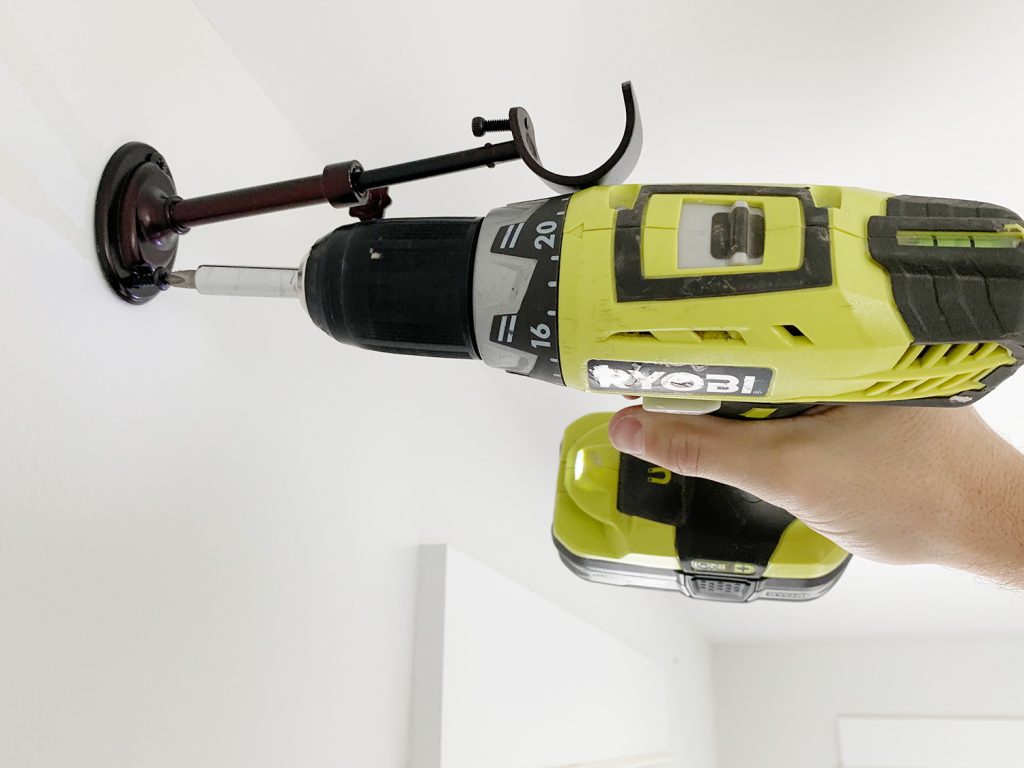
Step 4. Drill Bigger Holes & Add Anchors
When you’ve made pilot holes on the opposite aspect of the window utilizing the opposite half of your template (because of this you marked 10.5″ from BOTH sides of the cardboard) you may proceed. When you hit any studs, skip to the following step. In any other case, you’ll want so as to add anchors, that are sometimes supplied together with your curtain rod
Swap out your drill bit for the proper dimension that works together with your anchors (ours wanted a 3/16″ drill bit) and drill into every premade pilot gap to make bigger holes on your anchors. Bonus – the template acts as a good way to catch drywall mud!
With your whole anchor-ready holes drilled, gently faucet in your anchors in with a hammer or mallet. When you’re capable of push your anchors into the wall by hand, you’re making your holes too massive! Change to a smaller bit or maintain your drill steadier as you drill. Unfastened anchors may cause your rod to sag or fall out of the wall over time.
Step 5. Set up Your Curtain Brackets
The remainder is fairly simple – hammer in your anchors and safe your curtain rod hooks to the wall utilizing the supplied screws. We do all of this in real-time within the video above if you wish to see precisely how fast this complete issues goes.
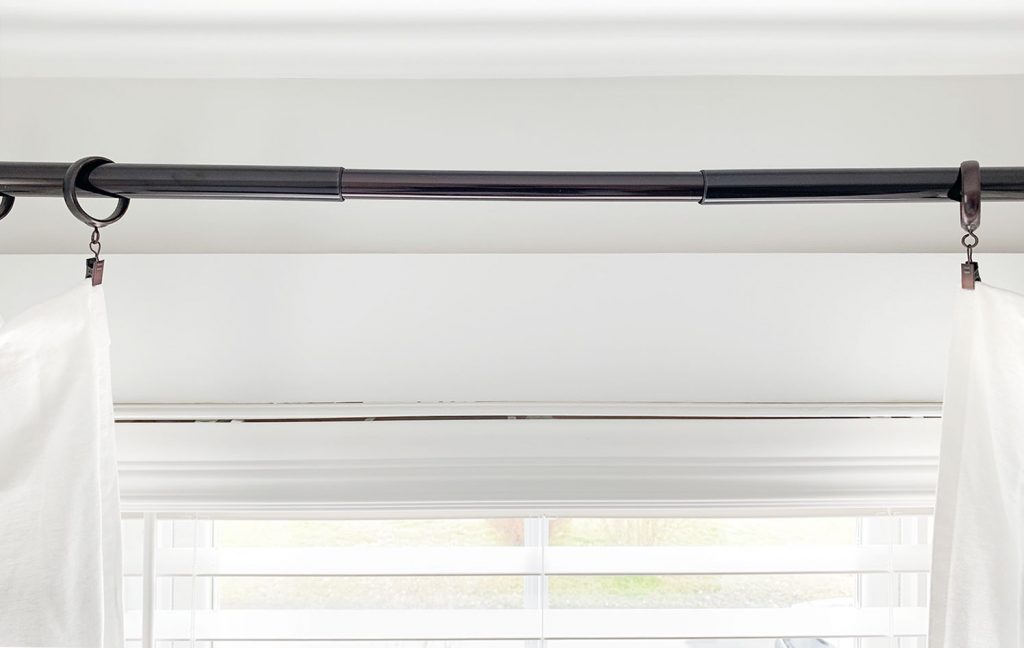
Step 6. Add Your Rod & Curtain Panels
With each brackets secured to the wall, you may grasp your rod together with your curtain panel already connected. Now you’re accomplished… except your panels require any hemming. Or you can simply cover the bottoms behind a mattress like we did under. Ha!

Bonus Tip: Right Any Rod Sagging
Relying in your rod and the way extensive it’s, you could discover that it seems to sag a little bit bit within the center – particularly the place the smaller rod piece connects into the bigger ones. Your bundle might include a 3rd, heart bracket to hold within the heart of your window, however typically a 3rd brack could be overkill for any window that’s not tremendous extensive – so we depend on this bizarre little hack as a substitute. Emphasis on WEIRD.
First, I take a few of the protecting plastic finish caps that come on the curtain rods (they’re simply packaging) and use a utility knife or scissors to chop off some small slices.
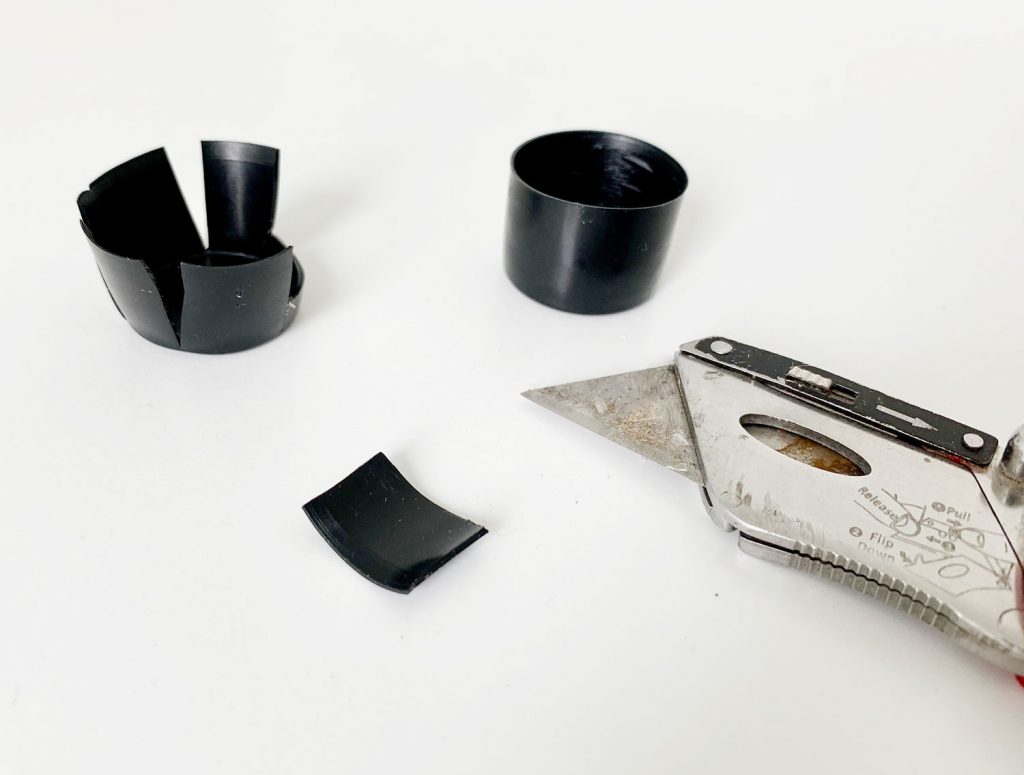
Then we tuck a chunk contained in the curtain rod at no matter connection level is sagging. It’s vital that you simply put it on the TOP aspect of the rod and should you can’t slide all of it the best way in, simply rotate your rod barely so it’s hidden from view as a result of nobody is viewing your rod from the highest.
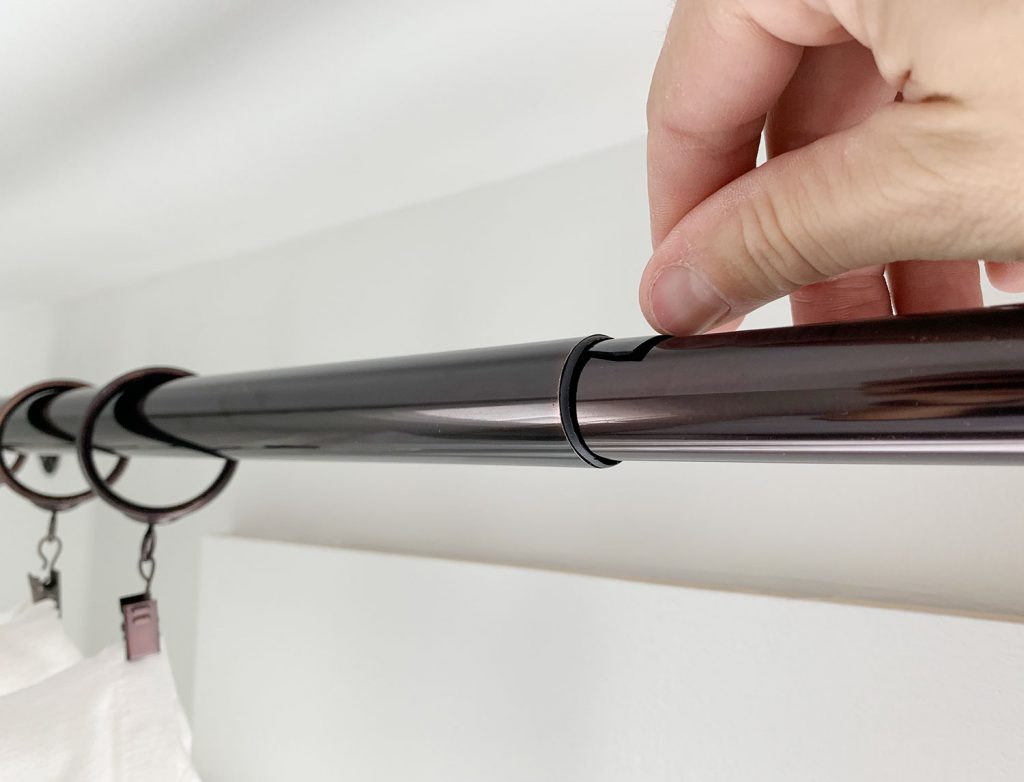
I do know it’s REALLY bizarre, nevertheless it has been a simple manner for us to right a little bit little bit of rod sag which makes my coronary heart very completely happy. Simply belief me – there’s a noticeable distinction and it now not seems to be prefer it’s unhappy and droopy. Plus it’s free and I’m scrappy. So yeah. 5 stars, would suggest.
Extra Curtain Hanging Recommendation
And once more, you may take a look at our tips for hanging inexpensive white curtains and making them costlier alongside the best way.

If all of this nonetheless looks as if an excessive amount of bother – you can get away with no curtains in your room too. We wrote a information for when curtains don’t belong in a room and what you are able to do to your home windows as a substitute. Spoiler: some rooms shouldn’t have window therapies in any respect!
P.S. Wanna know the place we received one thing in our home (or what coloration’s on the partitions)? Click here. And we made the identical
*This submit accommodates affiliate hyperlinks*


