I ought to have spent yesterday ending up the trim within the studio, however as an alternative, I made a decision to work on the pendant gentle that can go over my desk. After contemplating a number of totally different choices, together with each ready-made and DIY lights, my mother recommended that I make a pendant gentle impressed by a bit of art work that I made for our front room.
This gradient wood tasting spoon pinwheel that hangs in our front room is my favourite piece of artwork that I’ve ever made. I really like the whole lot about it, from the dimensions of the wooden tasting spoons, to the colours, to the gold accents. So when she recommended turning this concept right into a pendant gentle for my studio, I used to be on board with that concept instantly.

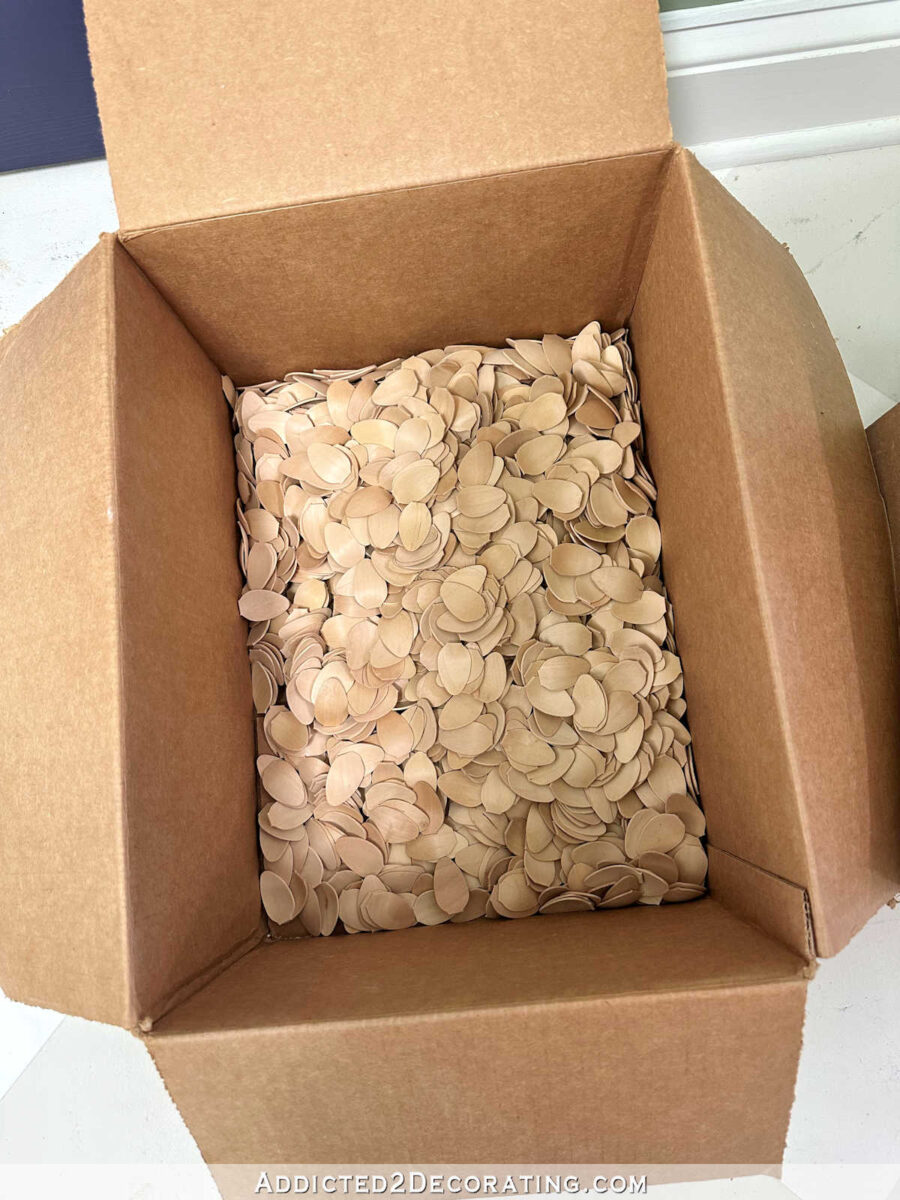
I’ve been engaged on getting the spoons ready for a few weeks now. It has been very time consuming, and I’m solely about 1/3 of the best way completed with prepping the spoons. I made up my mind that I’ll want about 1000 spoons for the sunshine, which implies that I needed to lower the handles off of 1000 wooden spoons on the neck, after which sand the remaining bowls to spherical off each bit. As soon as I get all of these sanded, I can begin priming and portray the spoon bowls.
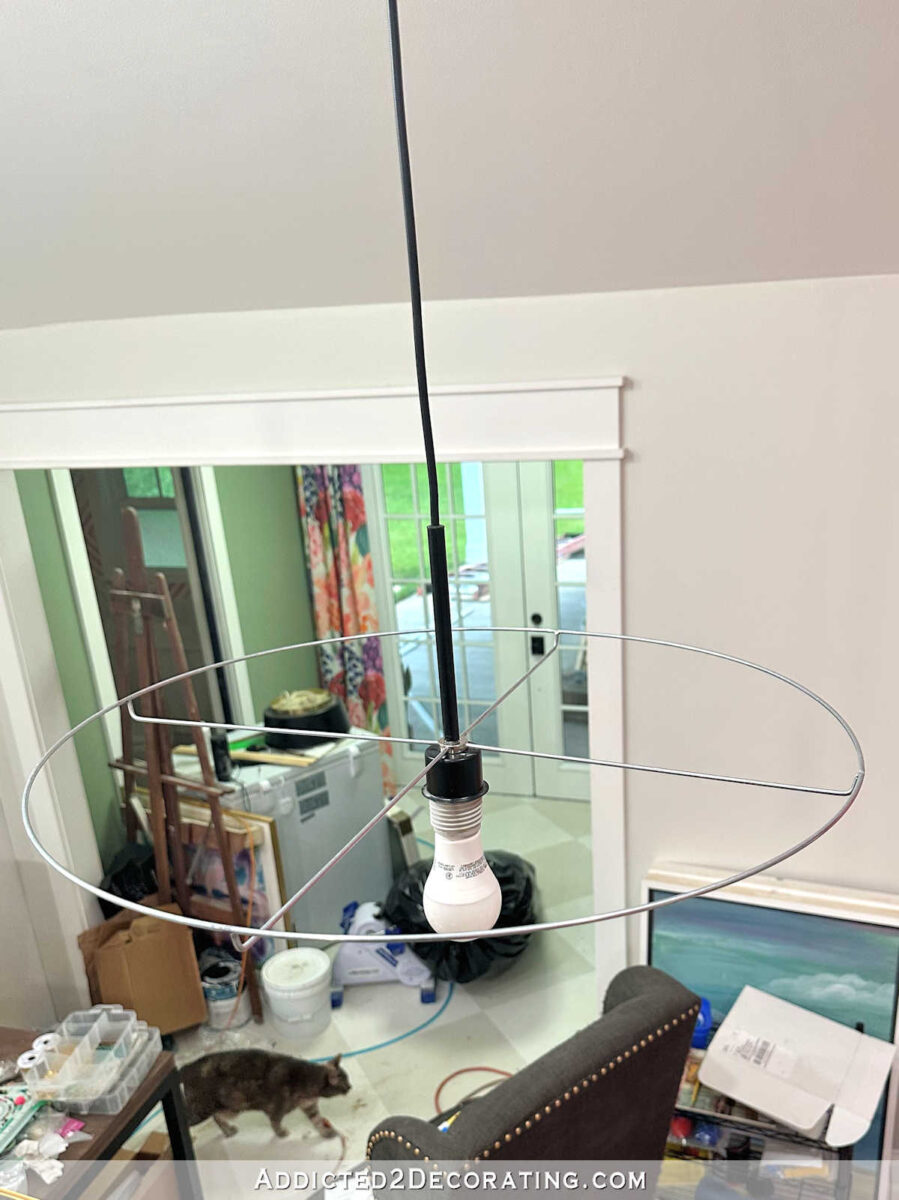
However yesterday, I made a decision to work on the opposite a part of the pendant gentle, which is the precise body that the spoon bowls will ultimately be connected to. To be able to make the body, I bought one 22-inch lamp shade wire that has the body that attaches to the sunshine/lamp (i.e., the highest lamp shade ring). (Sorry, however I don’t know the technical phrases for these elements, and I can’t discover my bill from the place the place I bought these.) Utilizing a make-your-own-pendant-light equipment from Lowe’s, I connected the 22-inch lamp shade wire to the sunshine equipment after which put in the sunshine.

Right here’s a take a look at it from the highest. Please excuse the entire mess within the background. 😀
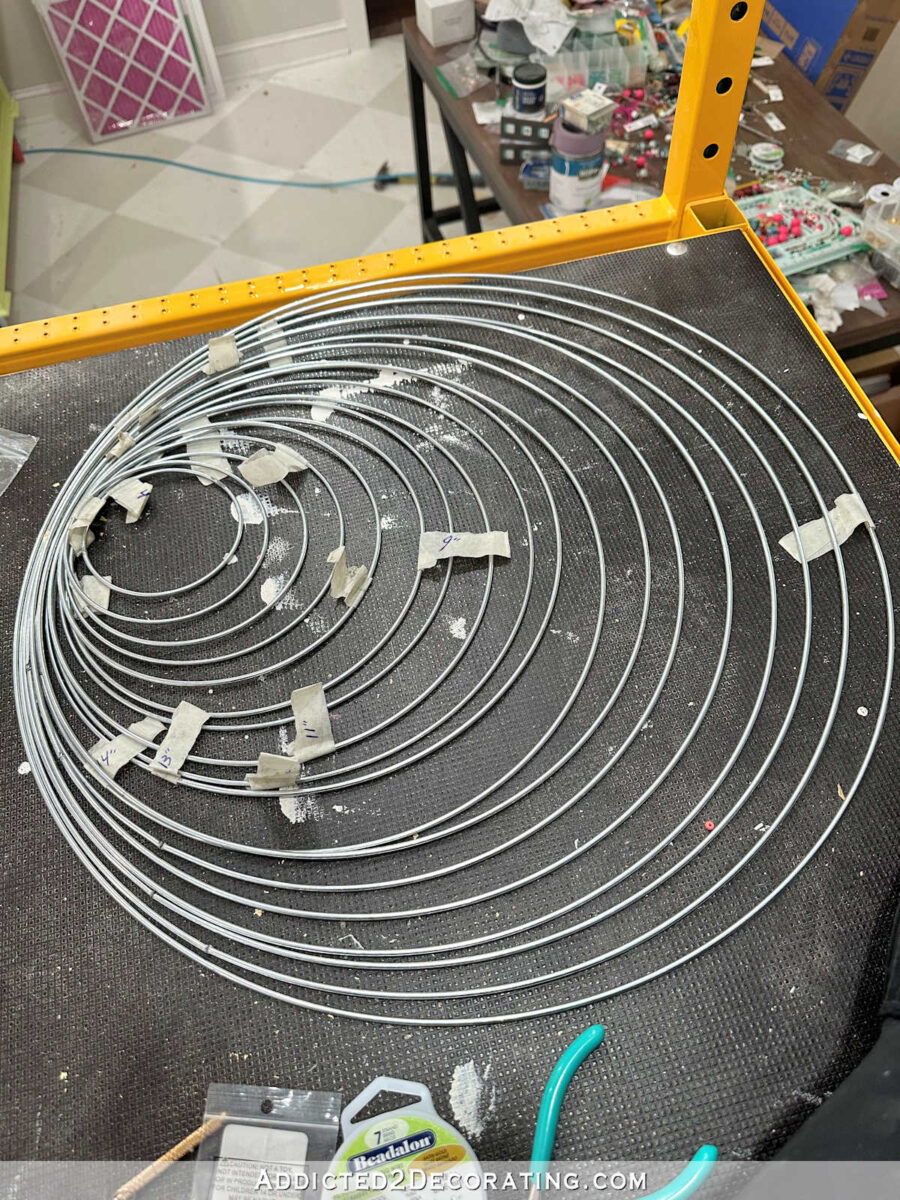
Along with that high ring, I additionally bought 19 further backside lamp shade rings from 21″ to three″, and each whole-inch dimension in between. I wasn’t certain what number of I might find yourself utilizing, however my pinwheel art work has 20 rows of spoons, so I purchased 20 rings in whole.
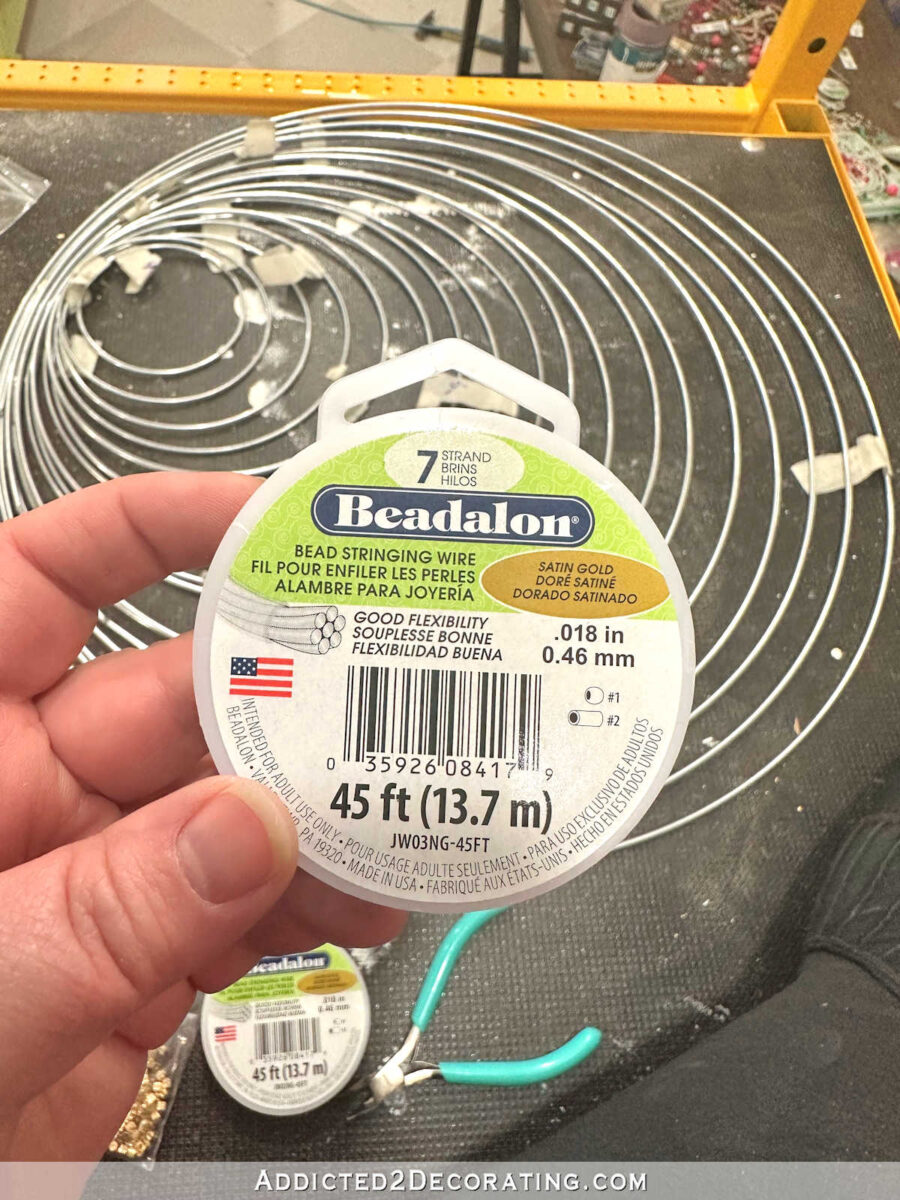
After contemplating a number of totally different choices for connecting the rings to one another, I lastly determined that this is able to be the proper alternative to place my newly acquired jewelry-making abilities to work on a non-jewelry mission. So I bought some beading wire…
After which I bought these screw-tite crimp beads. After I make necklaces, I’ve stop utilizing precise crimp beads as a result of I had a necklace fail and are available aside whereas I used to be carrying it. When that occurred, I went in the hunt for a greater solution to safe beads on beading wire, and I discovered these screw-tite crimp beads. Every bead has a tiny little screw on the aspect that tightens onto the beading wire to safe it. That is what I take advantage of on my necklaces now, so I bought a package deal to make use of on my pendant gentle.

It’s so tiny that I had a really troublesome time getting my digital camera to give attention to the precise screwdriver.
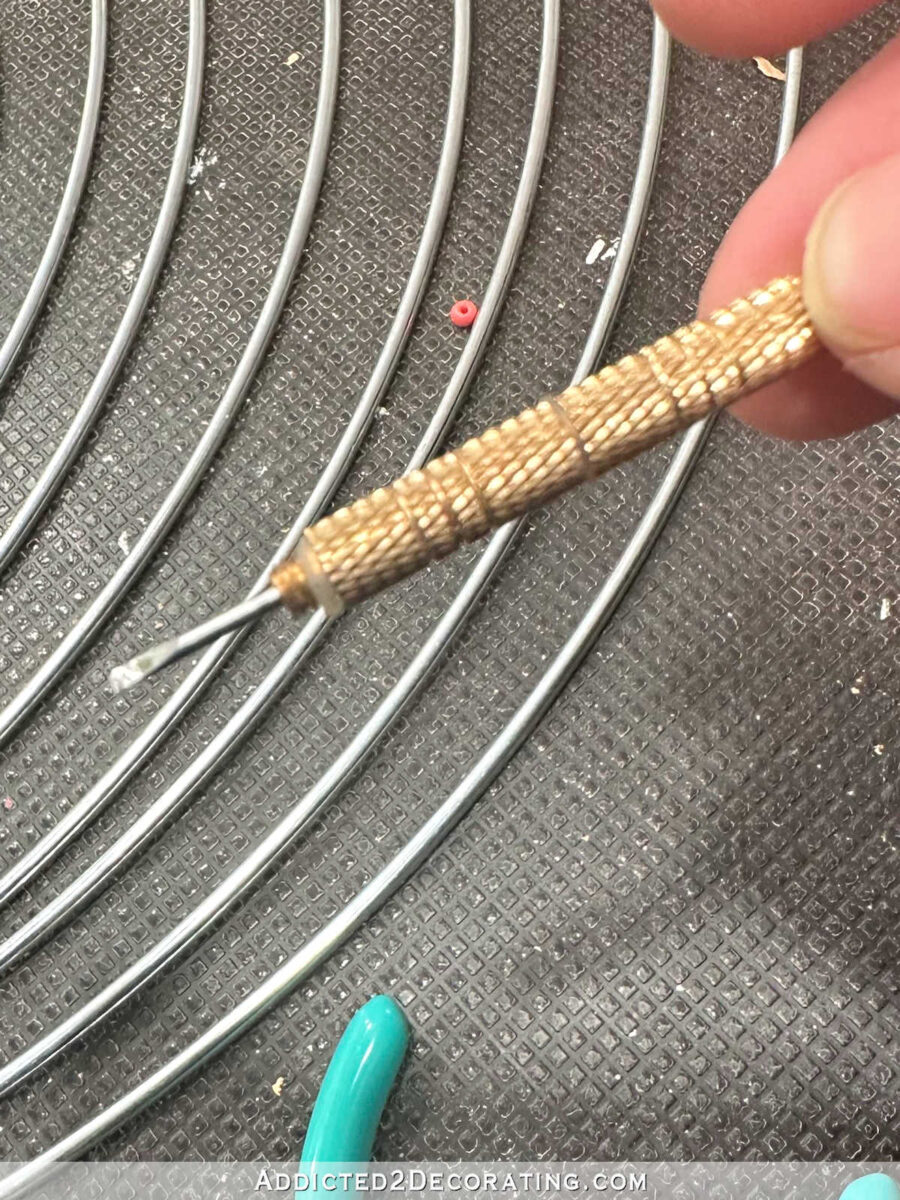
Anyway, you may see how tiny it’s. It’s like a type of small screwdrivers you’d use to tighten screws on a pair of glasses.

And to chop the beading wire, I used my little jewelry-making wire cutters.

I lower items of the beading wire to three inches lengthy…
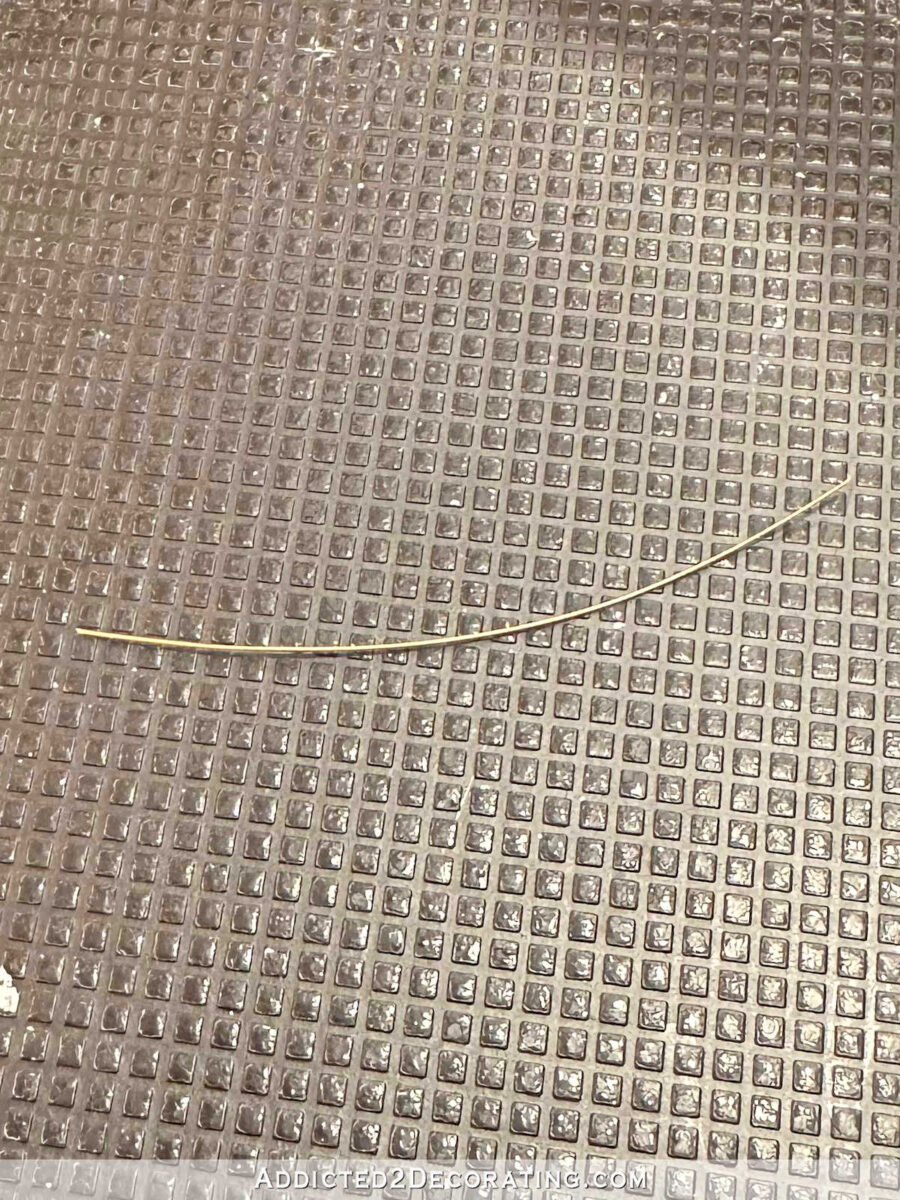
After which I bent the items of wire in half.

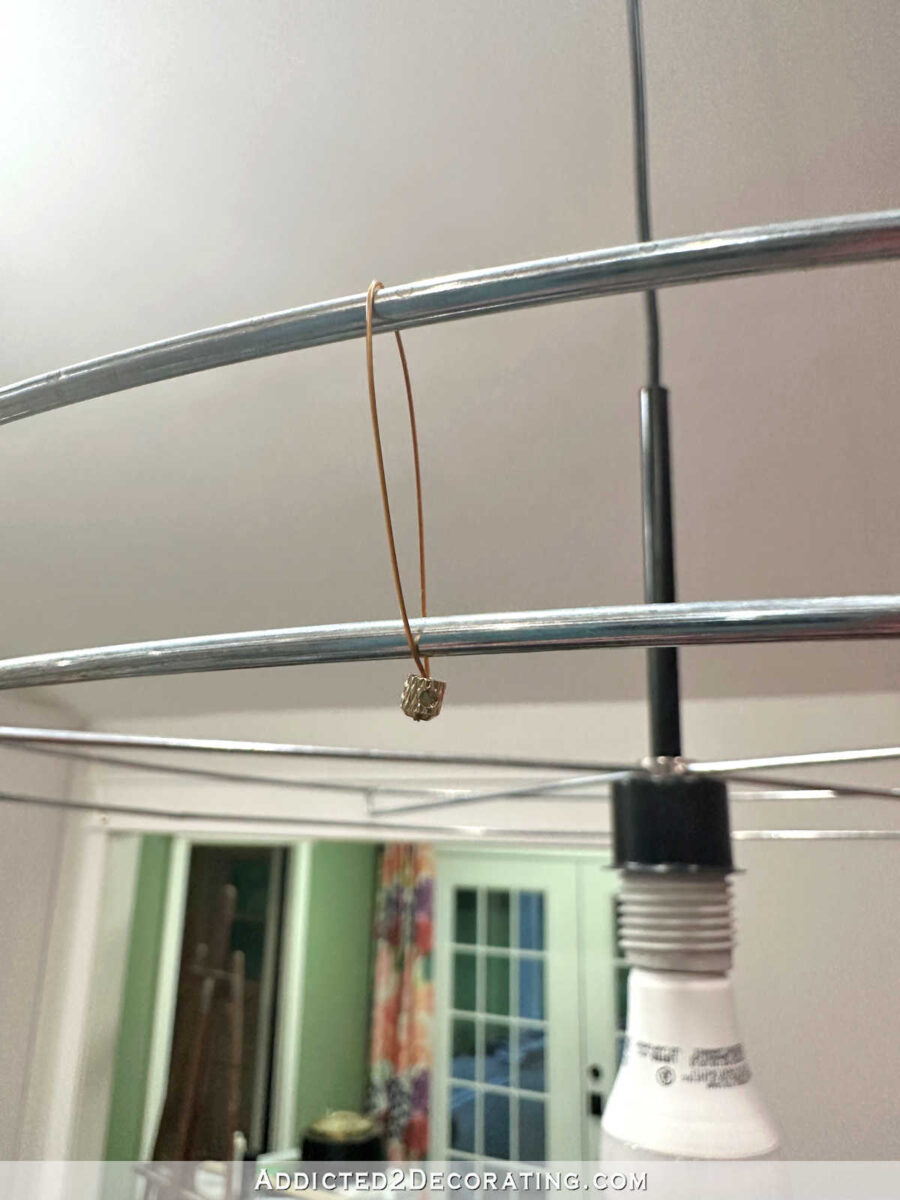
I wrapped the bent wire round two lampshade rings, put the ends of the wire by way of a crimp bead, after which tightened the screw on the crimp bead. I used 4 items of wire to safe every lampshade ring to the earlier ring.
I continued that course of till I had 12 rings connected, with every ring connected to the earlier ring utilizing 4 items of wire and 4 crimp beads.

You possibly can see within the photograph beneath how I staggered the wires with each different ring.
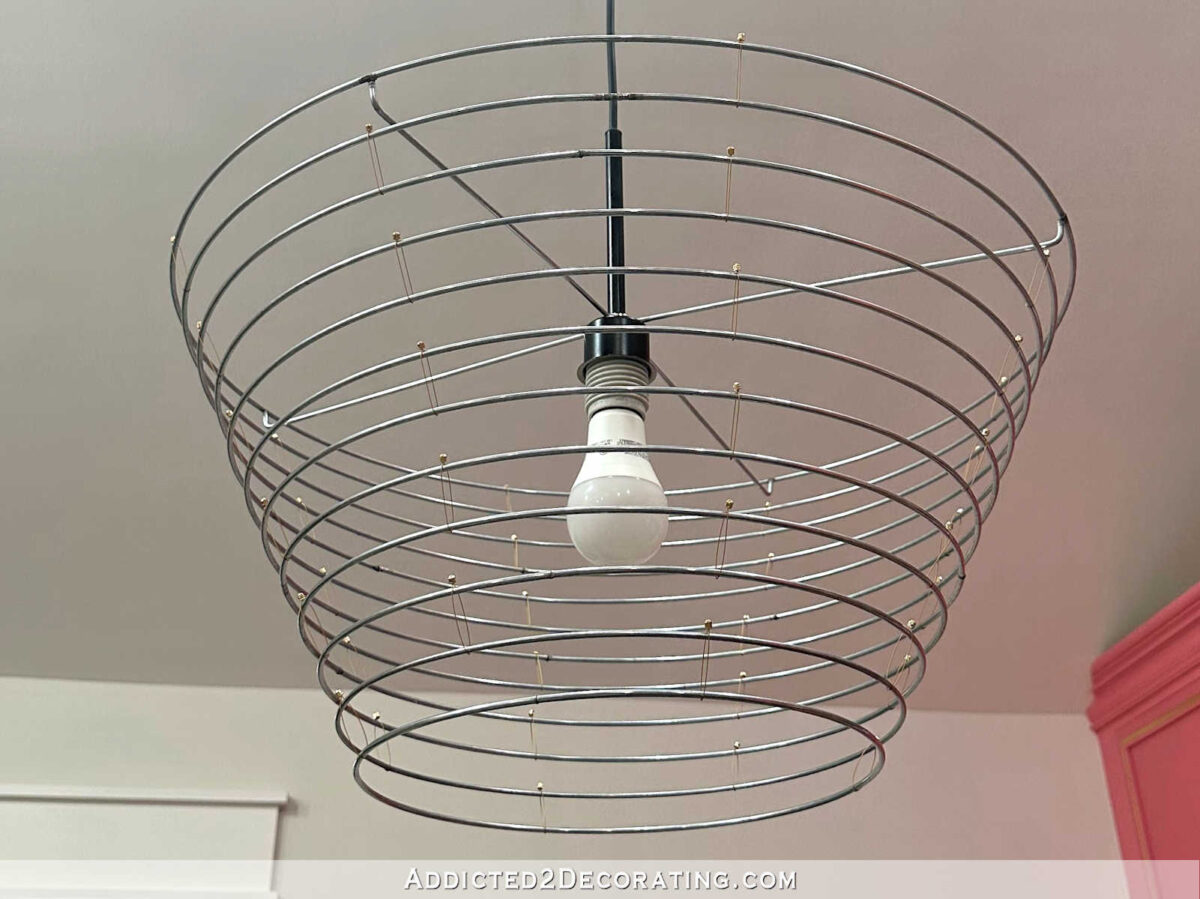
I ended at 12 rings, however I could add three extra for a complete of 15 rings. After which as soon as I get the entire spoon bowls sanded, primed, and painted, I’ll drill a gap on every bowl and fix each to the pendant gentle kind utilizing 10mm leap rings.

I’m nonetheless not sure in regards to the shade(s) that I’ll be utilizing on the spoons. I don’t know if I’ll attempt to match a rainbow of colours on the sunshine like I did on the unique pinwheel art work, or if I’ll simply do a refined gradient from one shade to a different. Or I might even select only one shade, and do an ombre design from darkish on the highest and get regularly lighter in the direction of the underside. I’m undecided but, however it’ll come to me. Keep tuned for the remainder of this mission

Addicted 2 Adorning is the place I share my DIY and adorning journey as I transform and beautify the 1948 fixer higher that my husband, Matt, and I purchased in 2013. Matt has M.S. and is unable to do bodily work, so I do the vast majority of the work on the home on my own. You can learn more about me here.


