We’ve painted kitchen cabinets earlier than. We’ve done Ikea kitchen cabinets earlier than. However portray Ikea kitchen cupboards was a brand new combo transfer for us. And regardless of a nagging voice in our heads that requested if it was a foul thought (paint laminate? or slick manufacturing facility completed cupboards?! can that even be sturdy?! ), we’re extraordinarily pleased with the ultimate outcome. Plus, it was fairly straightforward to do – no paint sprayer or fancy tools needed!
We’re a couple of month into utilizing them day-after-day and thus far they’re holding up splendidly. They’ve been scratched, scrubbed, kicked, and real-life examined by two children and thus far no scrapes, dings, or dents to report. They appear nearly as good because the day we freshly painted them, and as clean as factory-made Ikea cupboards – so we’ll share how we received such even protection.
Earlier than I present you the step-by-step directions, let me provide you with some context for the challenge.
Why Did We Redo Our Kitchen With Ikea Cupboards?
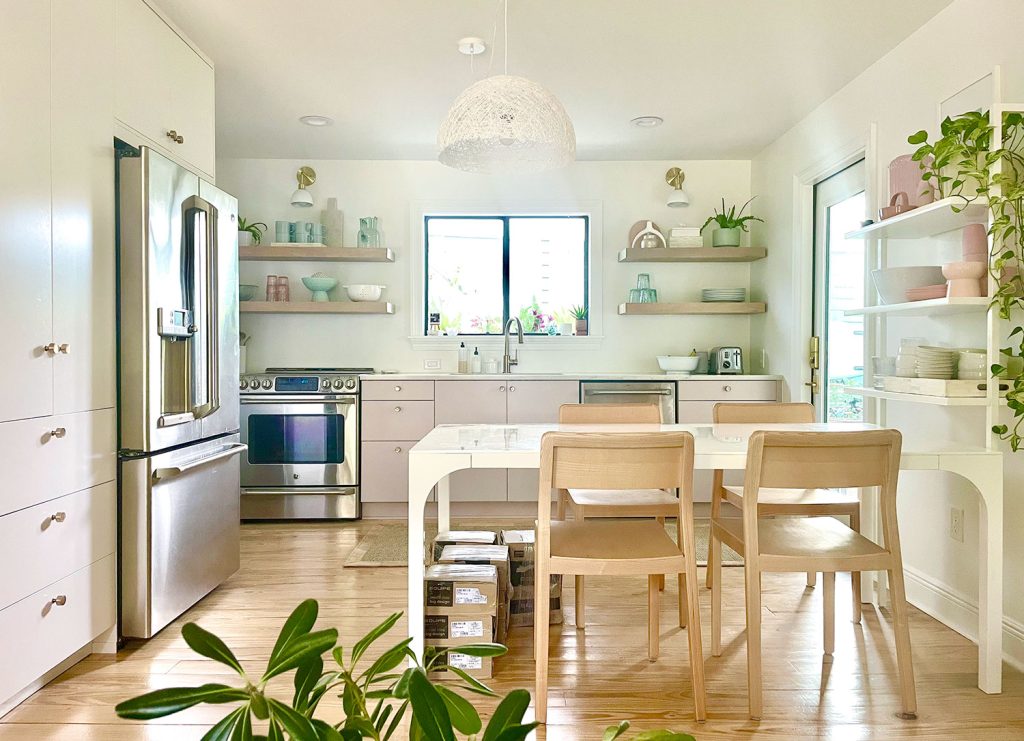
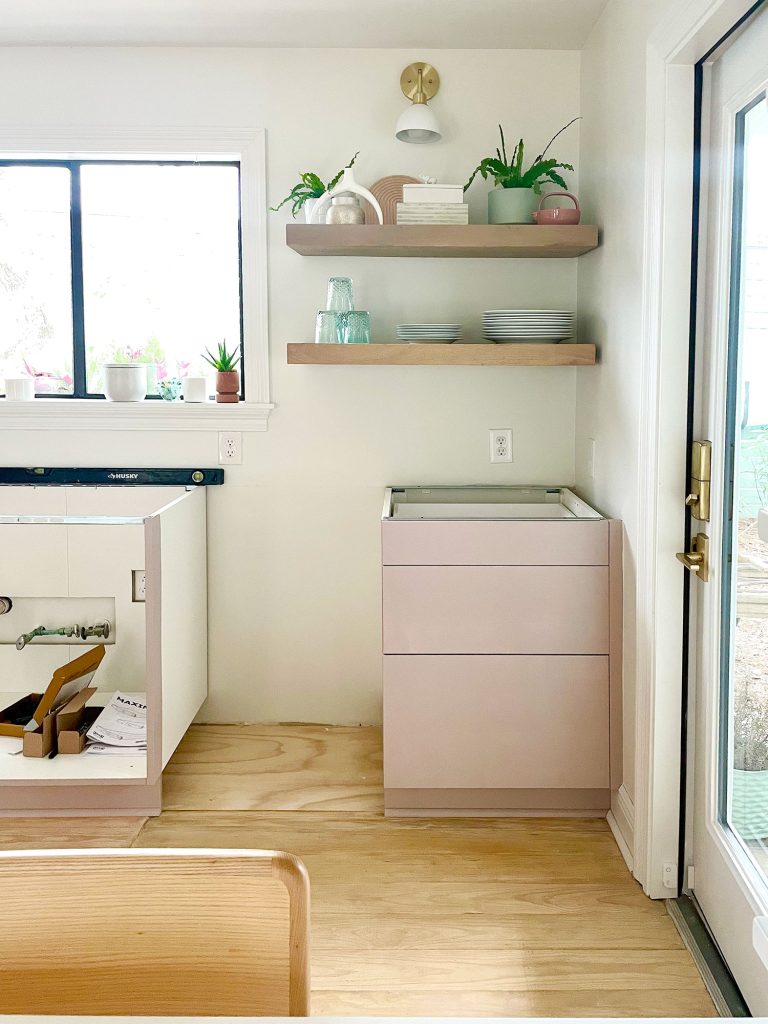
As we mentioned in our last podcast, we needed to interchange our outdated kitchen cupboards to raised maximize the storage alongside that again wall. It’s a small kitchen and, though we’d organized it carefully sufficient to make it work for the previous two years, we knew there was room for enchancment.
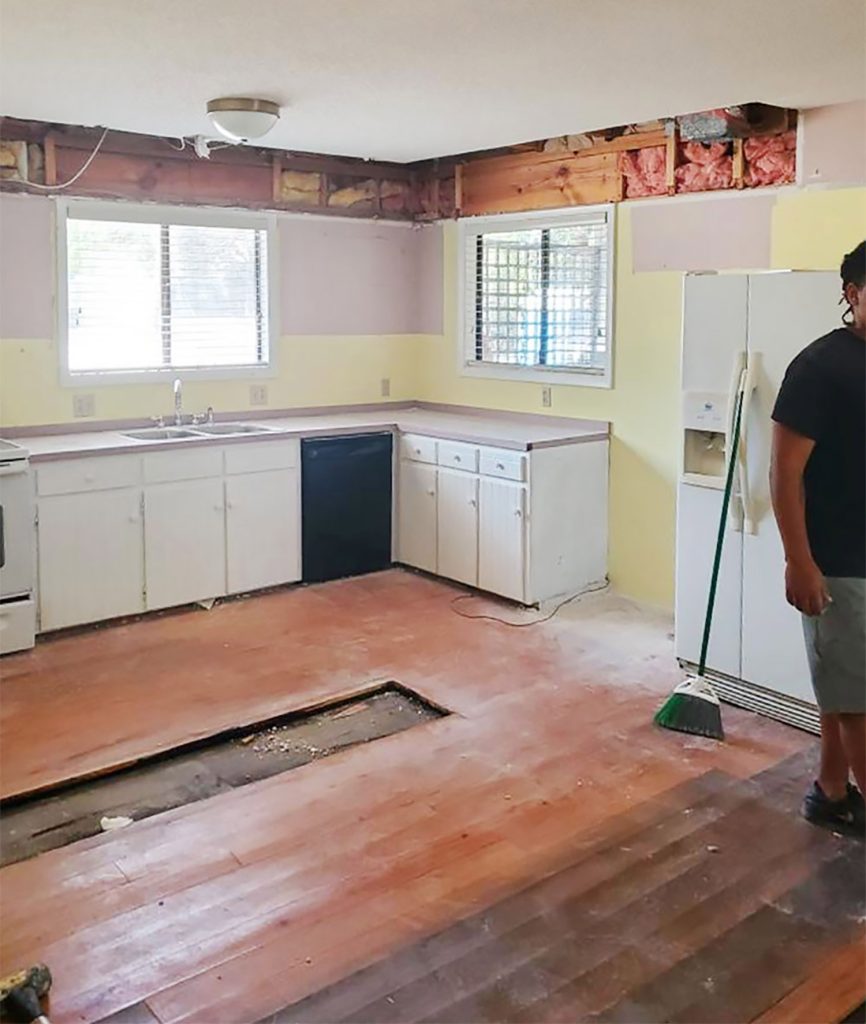
The thin drawer pictured under is a good instance of how inefficient the outdated thickly-framed cupboards had been. There was a lot wooden framing across the drawers & doorways that all the things was extra cramped than it wanted to be. What do you even put in a drawer that’s one olive oil bottle vast?
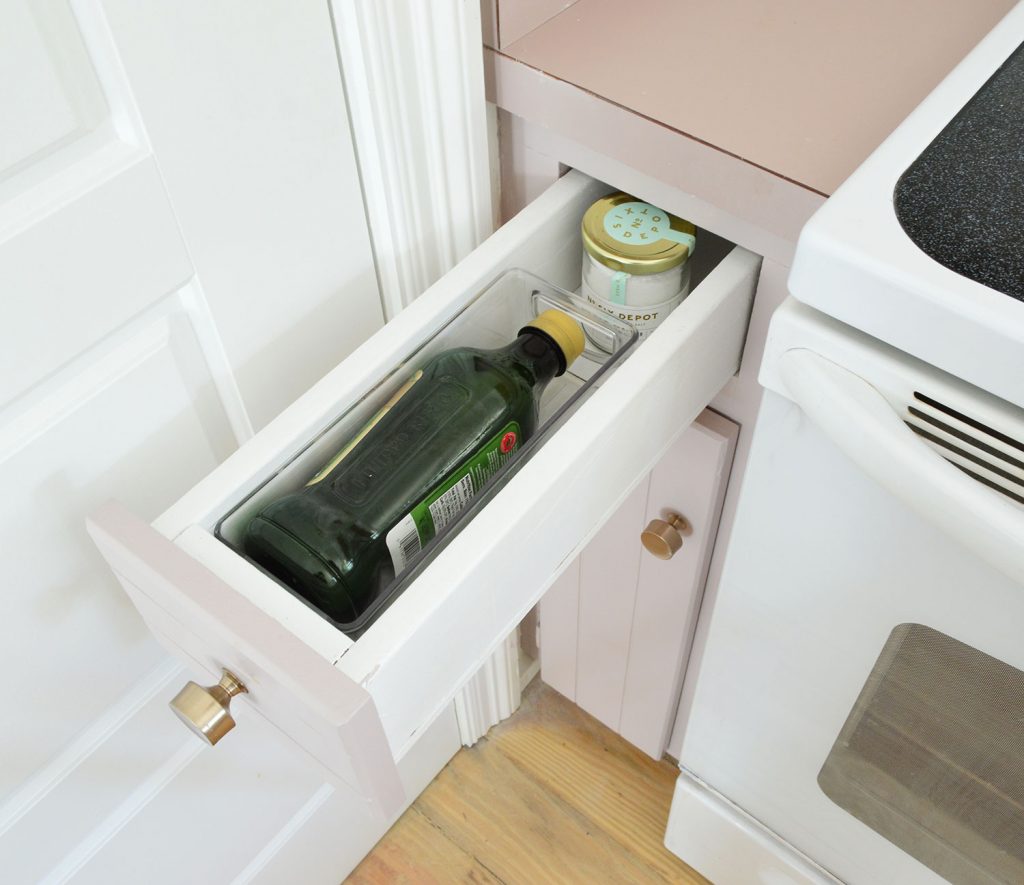
Sure, that’s the identical sized olive oil bottle within the photograph under, besides now it may arise as a result of the drawer is a lot deeper together with being considerably wider, so we will retailer much more. We knew from our earlier expertise with Ikea kitchens (like at our beach house) that we might get massive purposeful good points by changing the cupboards. For one, there’s a lot much less thick framing across the sides of Ikea cabinets- as you may see under – plus we shifted the range over a bit, so this drawer ended up being rather more helpful for us.
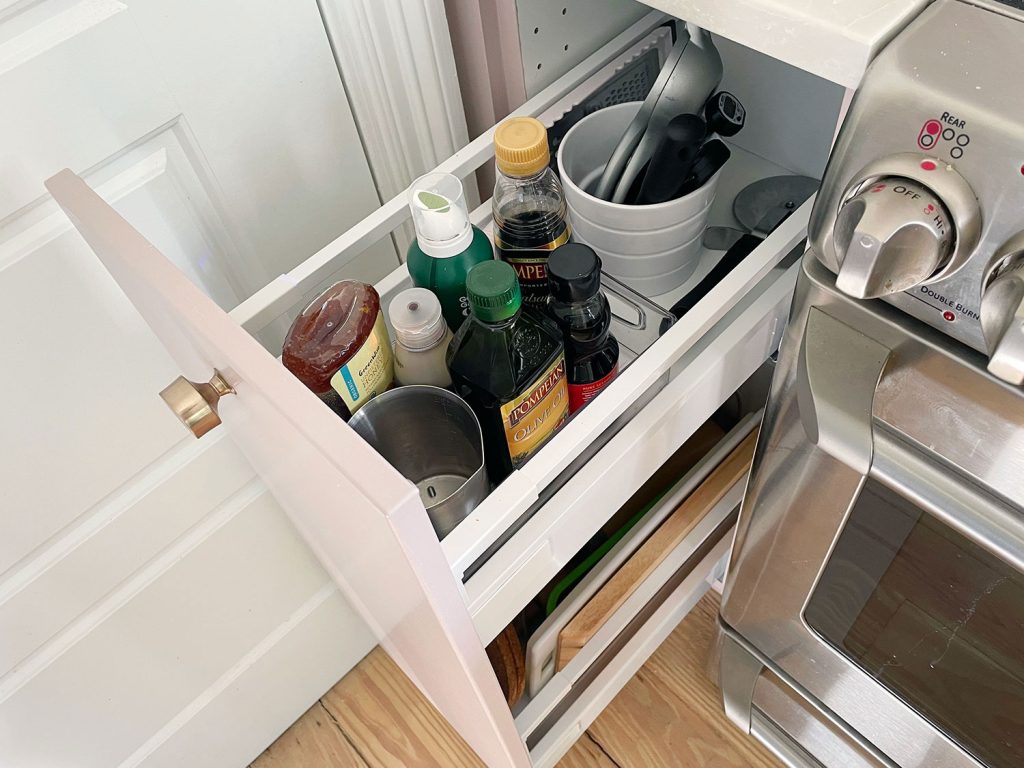
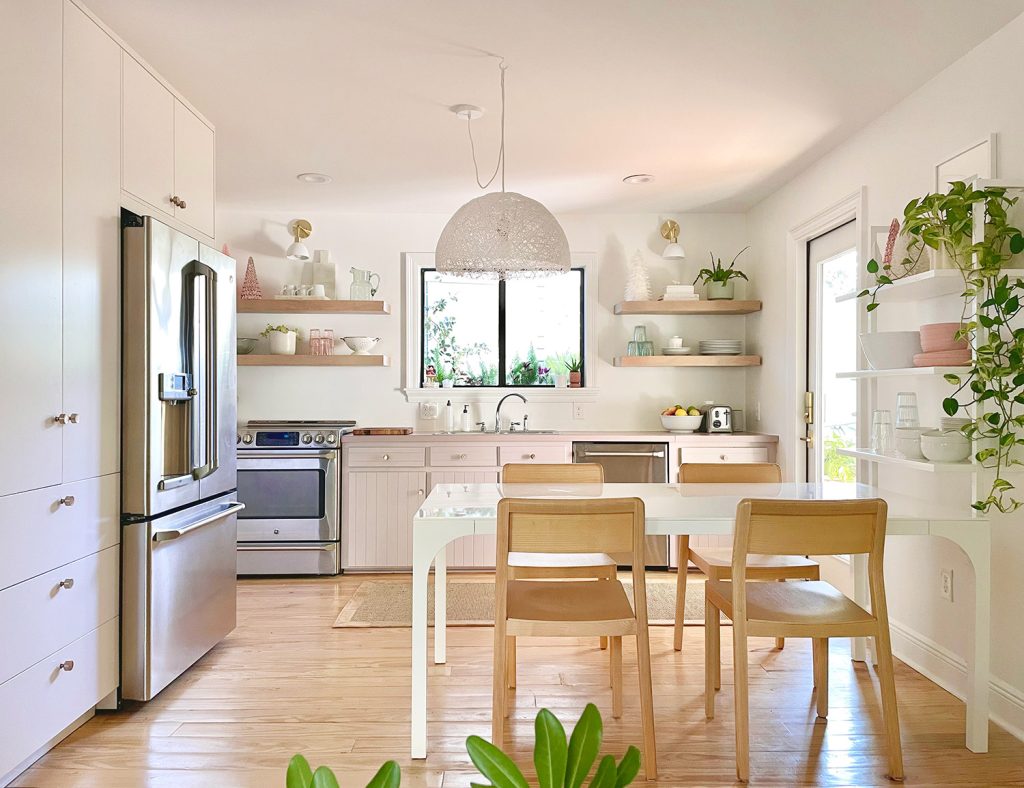
To not point out that Ikea cupboards have so many customizable programs you may add (secret drawers that nest inside different drawers, caddies that match completely to corral issues, and so forth). I’d say we upped our small kitchen’s effectivity by at the very least 50% by upgrading the cupboards. We’ll present you extra about how we organized them in a future publish. For now, again to the topic at hand: how we went from “Ikea white” to a customized paint colour of our selecting.
Why Paint The Ikea Cupboards?
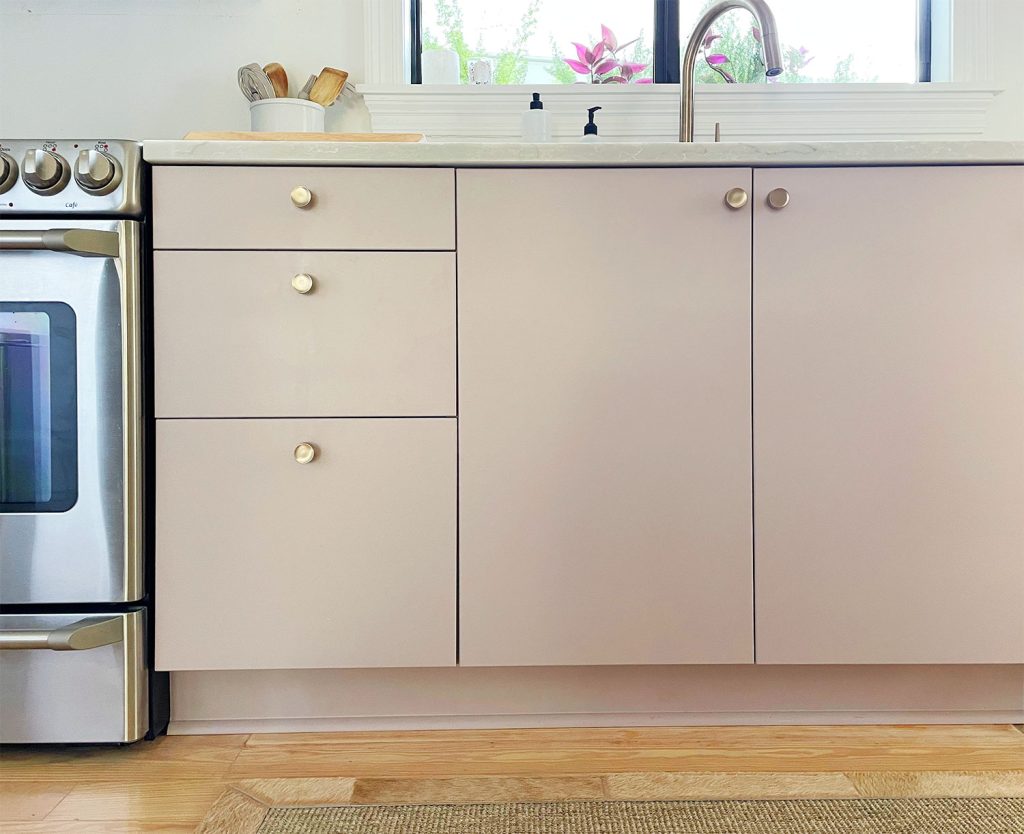
We REALLY cherished the mauve color we painted the old cabinets (Artsy Pink by Sherwin-Williams). These are the outdated cupboards under:
The mauve appears like a enjoyable homage to the unique laminate counters and even the partitions, which we found had been as soon as that colour throughout our first phase of renovations before we moved in.
Ikea doesn’t promote any doorways that colour and ordering paintable Semihandmade doorways is considerably costlier. Their DIY flat slab fronts would’ve price us about $600 vs the $185 we’d pay for white flat fronts from Ikea. And we aren’t any strangers to portray one thing, so it felt value making an attempt this, although laminate surfaces or slick pre-painted finishes (Ikea calls these “lacquered”) could be a little tough. Fortunately, paint and primer “know-how” is consistently enhancing and now you can get sturdy bonds, even with out turning to oil-based merchandise. So right here’s precisely what we used:
Instruments & Supplies For Portray Ikea Cupboards
We took a low-tech, low-mess strategy to this challenge (aka: no paint sprayer) so the fabric record is fairly easy. Had we been portray a bigger kitchen, we would’ve opted for a quicker paint sprayer strategy, however I personally discover that we might be extra methodical and cautious once we hand paint a challenge like this.
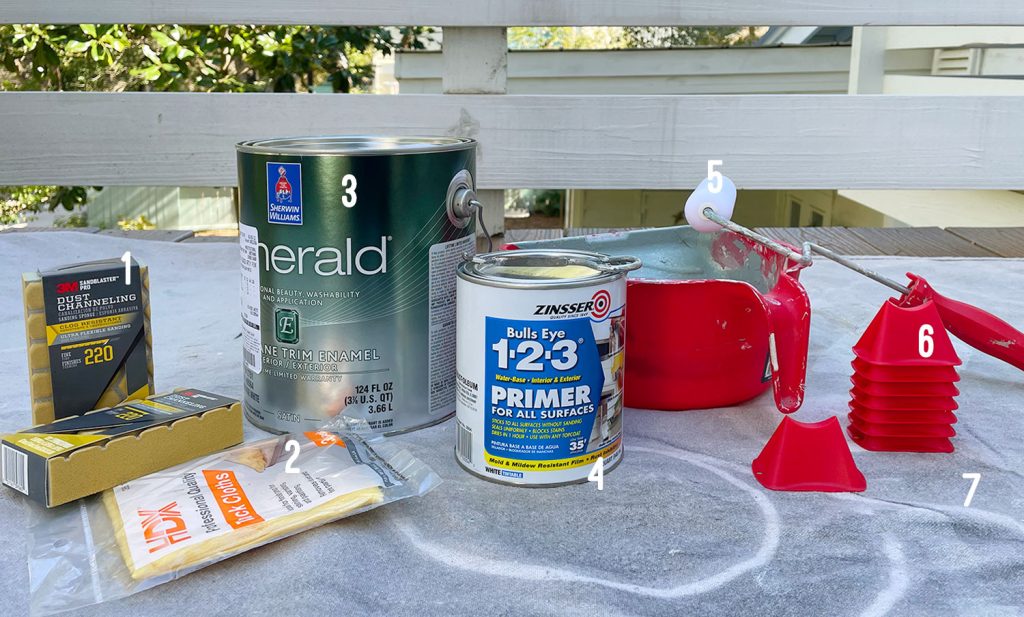
Along with your cupboards (we ordered Ikea’s VEDDIGNE door and drawer fronts) you’ll want the next:
- Sandpaper or sanding block in a 120 to 220 grit*
- Tack cloths
- Paint (we used Sherwin-Williams Emerald Urethane Trim Enamel in a satin end)
- Primer (we used Zinsser Bulls Eye 1-2-3 Primer for All Surfaces – a quart was greater than sufficient for us)
- Small 4″ or 6″ foam rollers, roller tray, and a small angled paintbrush
- Painter stands or tripods
- Dropcloth or comparable
- Your cupboard fronts, we had ordered Ikea VEDDIGNE doors
- Elective: Painter’s tape
- Elective: Liquid deglosser
*You can even use an electrical sander for a quicker outcome, however it takes some further care that we’ll discuss in a second
How To Paint Ikea Cupboards: A Fast Video!
If you would like the short & soiled model of this course of, I had enjoyable with this two-minute video that covers every step in a Gen Z-friendly, transition-tastic manner. You received’t catch me on TikTok or making IG Reels, however I like an enhancing challenge (I used to be the child in center faculty making all types of movies with star wipes and different “fancy” results). For the extra detailed scoop, we’ve received a full written tutorial AND A MORE DETAILED VIDEO afterward within the publish that features extra particular ideas. That one’s for all of my fellow Millennials that prefer to see somebody discuss by means of a challenge with out sparing a single element (as I’m identified to do).
Word: You can even watch this video on YouTube
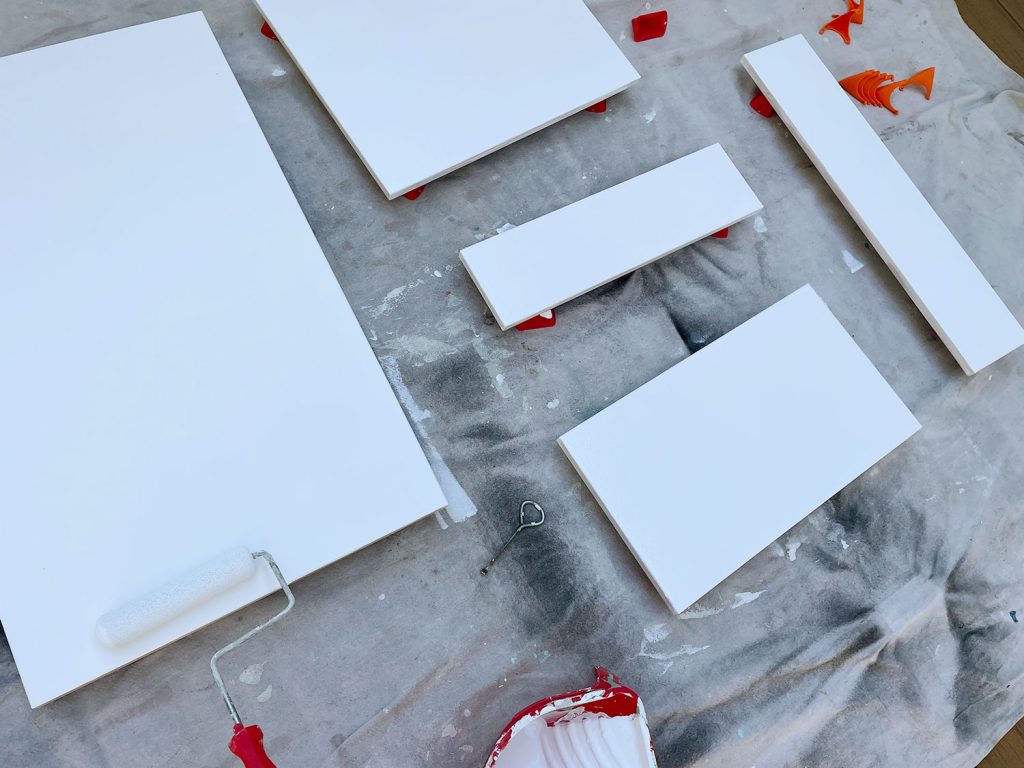
Step 1: Put together Your Cupboards
Since we had been portray our cupboards BEFORE assembling our kitchen, we simply unboxed the doorways and laid all the things out on a dropcloth to get began. However for those who’re portray an current kitchen you’ll need to take away all your doorways and drawer fronts first. You’ll additionally in all probability need to take the additional step of cleansing them with a liquid deglosser to take away any cooking grease or oils that will have constructed up in your doorways and drawers.
Step 2: Tough Them Up With Sandpaper
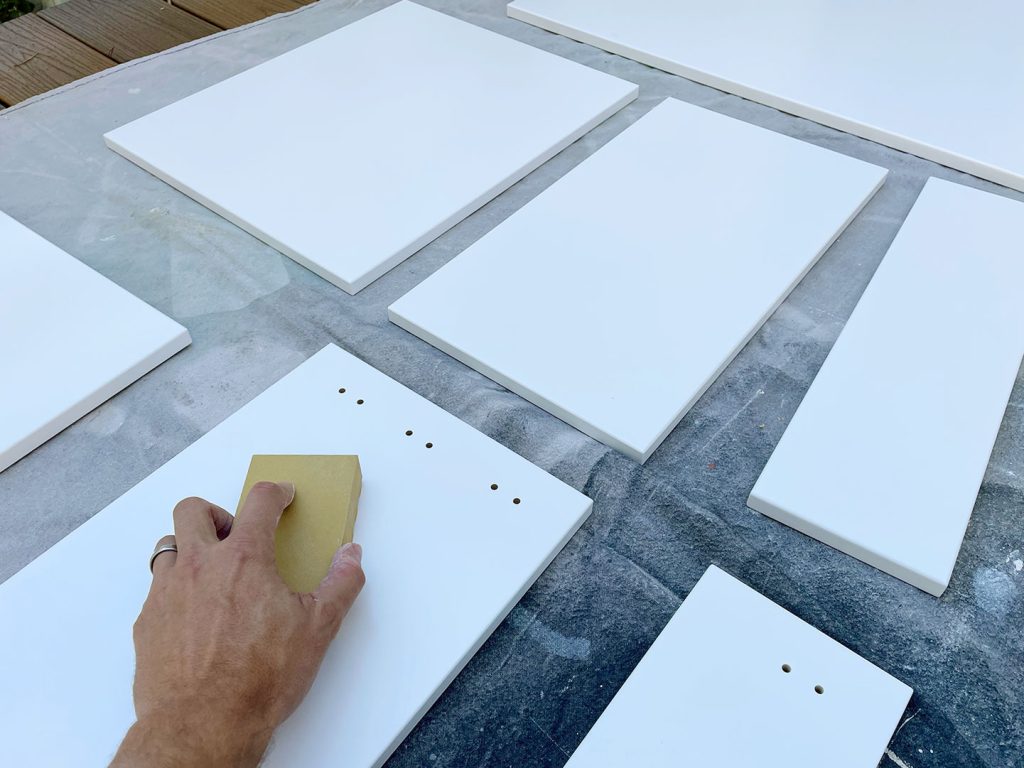
Even for those who’ve used a deglosser or liquid sandpaper, it’s nonetheless a good suggestion to tough up the floor with precise sandpaper to create a greater floor for primer and paint adherence. Prep is actually the distinction between painted cupboards that final and ones that look crappy inside a month. So don’t skimp on the prep, my mates. Belief me.
The objective was NOT to absolutely take away any of the white floor because it gives moisture safety to the MDF under. So we began fastidiously with a fine-grit 220 sanding block and ultimately labored as much as 120-grit sandpaper on our battery palm sander. I filmed the how-to movies earlier than testing out my energy sander as a result of it needs to be used with cautio. You’ll be able to simply sand off an excessive amount of for those who’re not careful- particularly on the sides and corners – so I didn’t belief myself to concurrently movie and sand with it. However it may pace up this step a bit.
Step 3: Absolutely Take away Your Sanding Mud
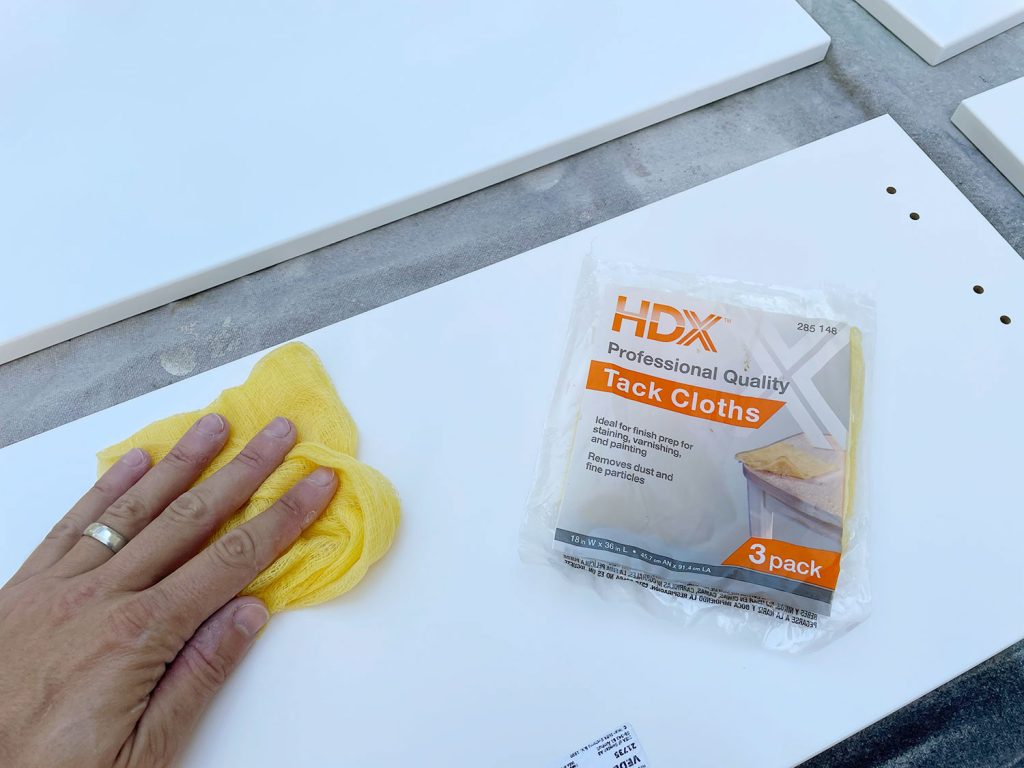
You need your primer to stick to the door itself, not a layer of sanding mud, proper? So we went over every door with a moist paper towel first, then a tack cloth. The marginally cheesy floor of the material is nice for grabbing high-quality particles earlier than you paint or stain any floor. You’ll want to get all sides.
Step 4: Prime the BACKS
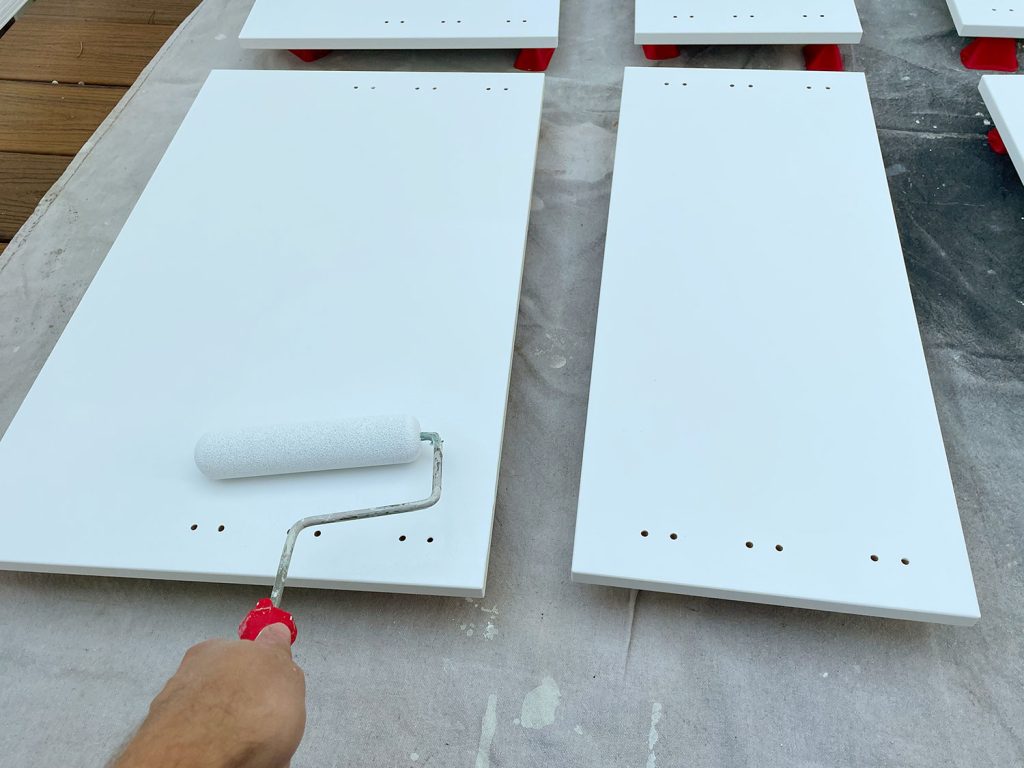
Earlier than we began priming and portray, we propped all the things up off our dropcloth with these paint project lifters. It was my first time utilizing them, so I used to be just a little paranoid that they may scratch or go away marks as I flipped the doorways over to work on both sides. So to be completely protected I made a decision to FULLY PRIME & PAINT THE BACKS earlier than doing something to the fronts. This fashion I’d by no means need to relaxation the painted fronts on the lifters. That manner, if the lifters did go away tiny marks someplace, it will be on the less-important bottom of the drawers (fortuitously they didn’t!).
Oh and as for the precise priming, we simply used a small foam roller to use a skinny and even coat of Zinsser Bulls Eye 1-2-3 and let it absolutely dry for 4 hours earlier than continuing. Retailer your moist rollers in a Ziploc bag for later use.
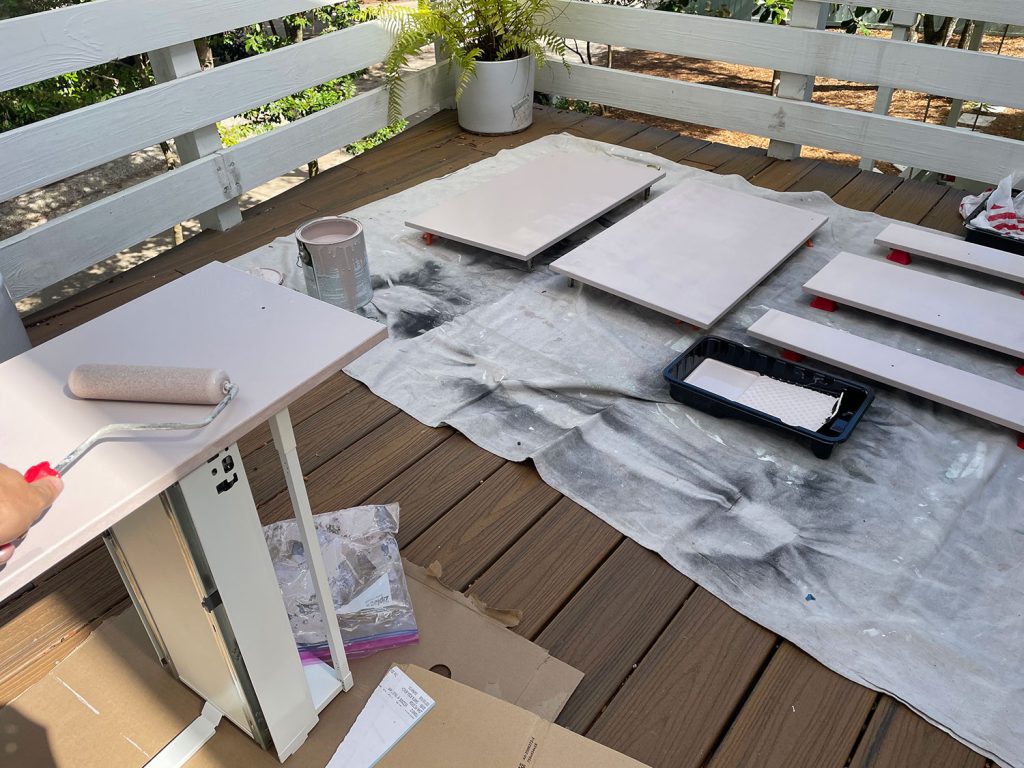
Step 5: Paint The Backs
As soon as our primer was absolutely cured, we used a recent curler to use two skinny and even coats of paint. Once more, we used Sherwin-Williams Emerald Urethane Trim Enamel primarily based on the advice from the paint professional on the retailer. We selected a Satin end as a result of we like that low-sheen look. For those who select a glossier end, simply bear in mind that curler and brush strokes might be simpler to see, so you could need to use a paint sprayer as an alternative.
Our common order for portray every door again was:
- Apply paint throughout the entire flat floor
- Gently roll alongside all 4 vertical sides to clean out any drips (extra on this within the subsequent step)
- Roll frivolously over the flat floor once more, utilizing parallel overlapping strokes in the identical path
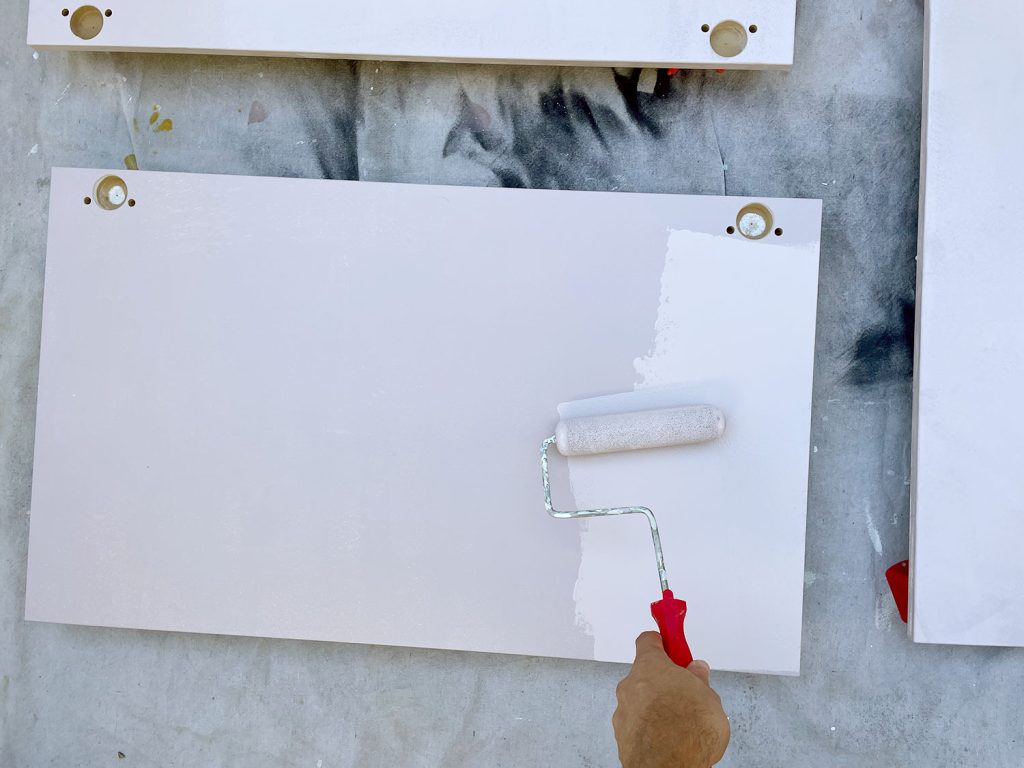
Step 6: Repeat! Apply A Second Coat of Paint.
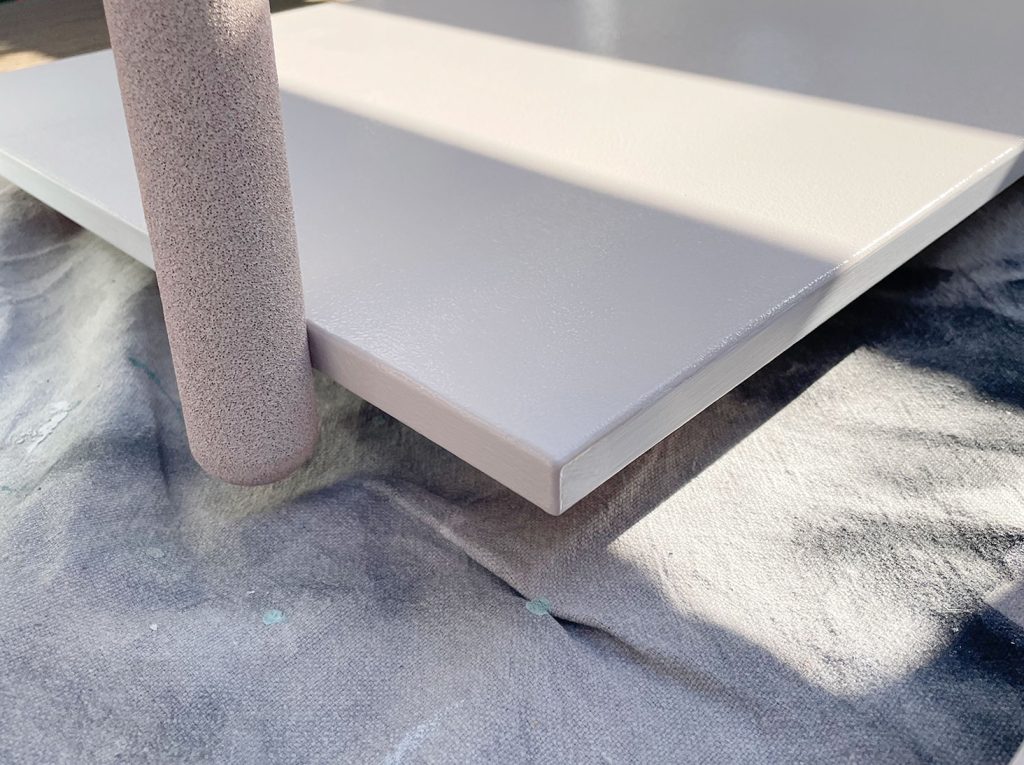
Don’t panic in case your first coat seems to be imperfect like ours did under. I all the time suggest two coats for any challenge as a result of it’ll provide you with a extra constant trying and stronger/extra sturdy end (and two skinny and even coats are WAY higher than one thick and gloppy one). So as soon as your first coat has absolutely dried (we let ours dry in a single day), roll on a second coat.
You can even see above that our protection is spotty on the perimeters. That was intentional. Since we had been focusing solely on the BACKS, we simply gently rolled the perimeters to clean out any drips in the event that they occurred. Therefore that bizarre half-painted impact on the sides above.
Why not paint the perimeters fully but? Properly, for those who press a curler too firmly or apply an excessive amount of paint in opposition to a skinny edge like this, it may trigger paint to gather alongside the underside. That’s one thing you may not discover till you flip issues over and, on this case, that may imply a ridge or bead of paint on the entrance of your cupboard. So we determined to totally paint the sides whereas portray the fronts, that manner any errant paint build-up could be on the less-important again aspect (spoiler alert: we didn’t have any anyway, however higher to be protected than sorry!).
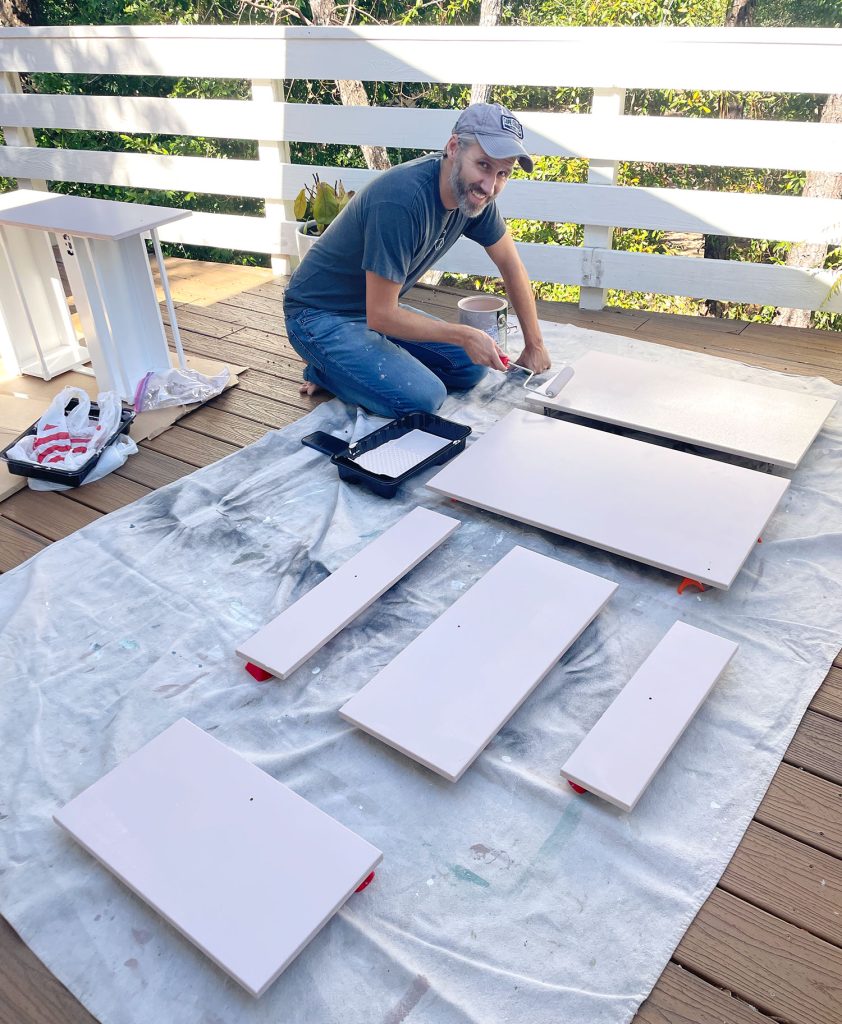
Step 7: Flip Over & Repeat Steps 4, 5 + 6
We gave the cupboard backs a full 24 hours to dry and harden, after which fastidiously flipped all the things over to start the method once more on the fronts. I do know this appears tedious, however we figured it was higher to be sluggish and methodical for the most effective outcome. Bear in mind, we actually didn’t need any dings from the paint lifters on the fronts, which we frightened may occur if we had been flipped them backwards and forwards all through the method.
So we proceed with a coat of primer on the fronts…
After which, as soon as the primer absolutely dried, we painted them (you guessed it, two coats).
This time round we made positive to get the perimeters good and coated. Once more, not utilizing an excessive amount of paint or an excessive amount of strain, however being cautious to get all the things nicely coated.
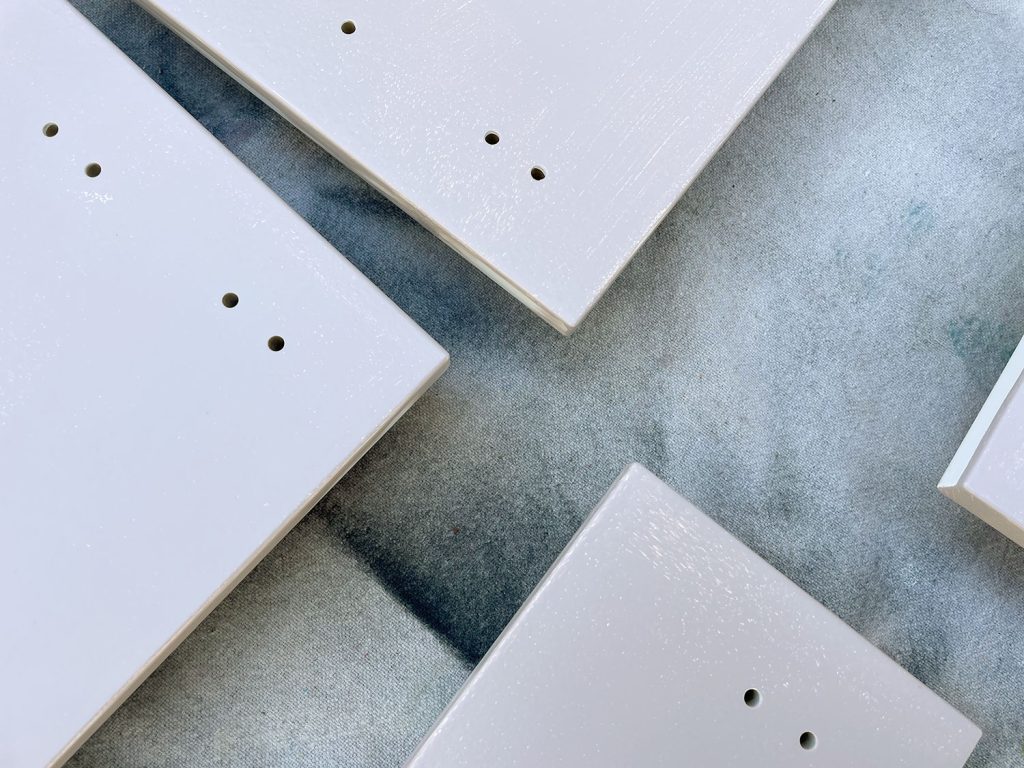
As soon as the second coat was accomplished on the fronts and sides, we let issues dry and treatment for an additional full 24 hours earlier than putting in them. It truthfully doesn’t harm to attend 48 hours. Most cupboard jobs get ruined by two issues: insufficient prep, or not sufficient curing time (actually something can get dings or scrapes if the paint isn’t absolutely dry).
Step 8: Don’t Overlook To Paint The Cupboard Bins
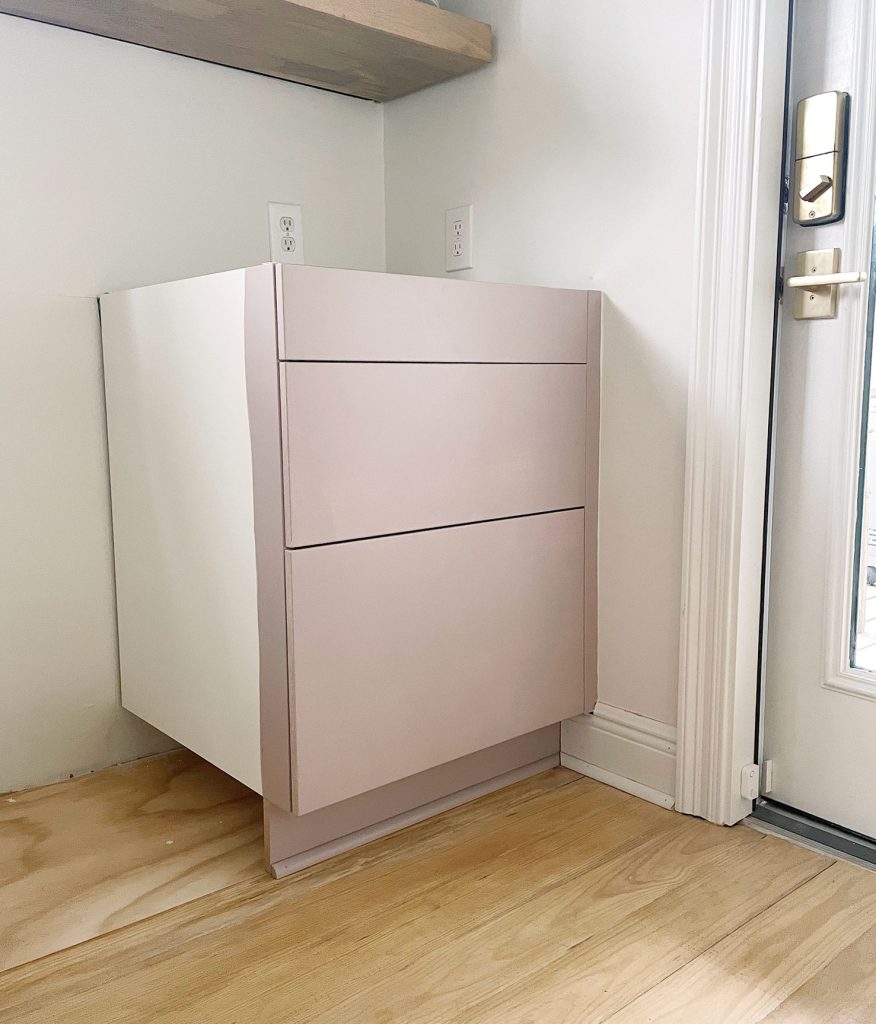
We used the identical method to color any seen elements of the cupboard packing containers themselves because the one I detailed above. We sanded/primed/painted the filler items on the perimeters, the toe kicks, and the entrance of the frames (however not the insides – these we left white). Use a small foam roller for as a lot as you may and be happy to make use of painter’s tape as wanted. You’ll probably want a short-handled paintbrush to edge some elements.
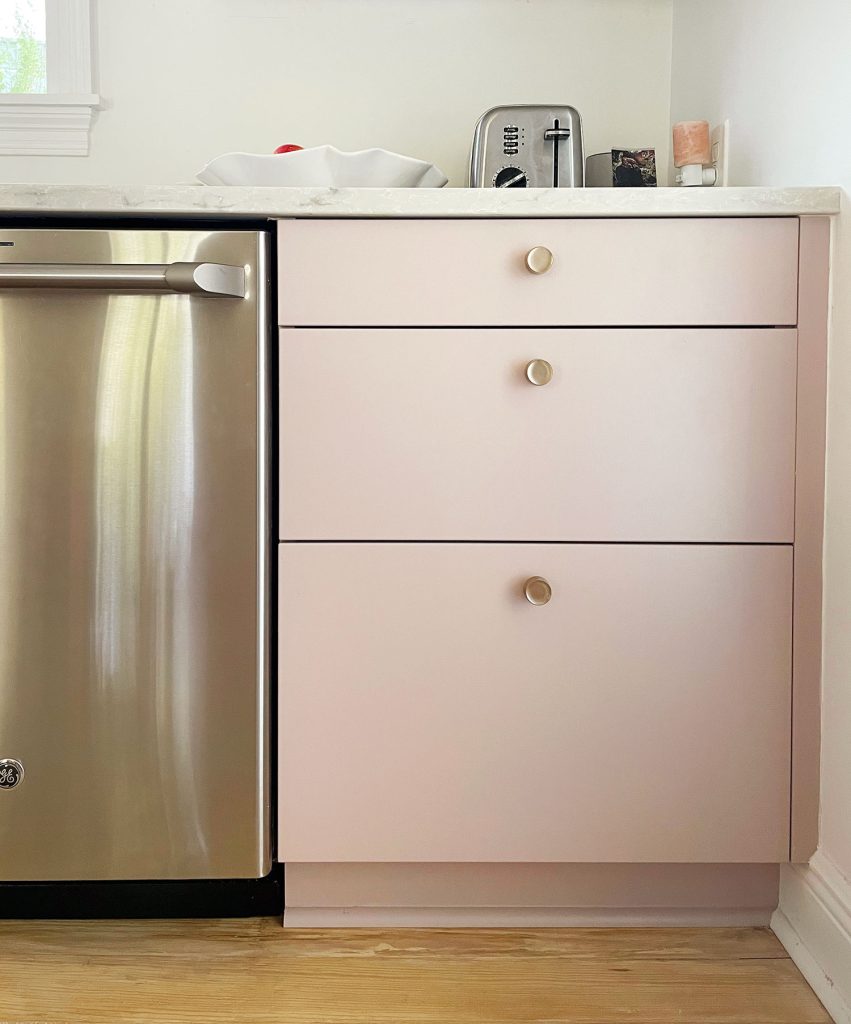
You’ll be able to see that we additionally painted barely across the aspect fringe of this cupboard subsequent to the dishwasher so we wouldn’t see any random flashes of white when the dishwasher door was open.
TIP: Possibly Make Your {Hardware} Holes Earlier?
Confession: the photographs above had been really taken BEFORE we completed portray the drawer fronts. Actually for those who examine the perimeters of the drawer fronts you may see that they’re not absolutely coated but.
Our counters had been being templated that day and we actually needed all the doorways and drawers in place, simply to make certain the templater took them into consideration when measuring for the countertop. However the climate had delayed our portray schedule, so we made the choice to put in all the things with just one coat of paint on the fronts (although we’d need to uninstall the door and drawers to complete up later).
We determined to benefit from this curveball and go forward with making our {hardware} holes whereas we had them hung for countertop templating (you may watch our cabinet hardware installation tutorial right here). Seems, we had been decidedly much less nervous about marking, taping, and drilling into the drawers understanding we wouldn’t be messing up the *last* paint coat on every door. If our drill slipped or plastic template scuffed one thing, we might cowl it with our final coat.
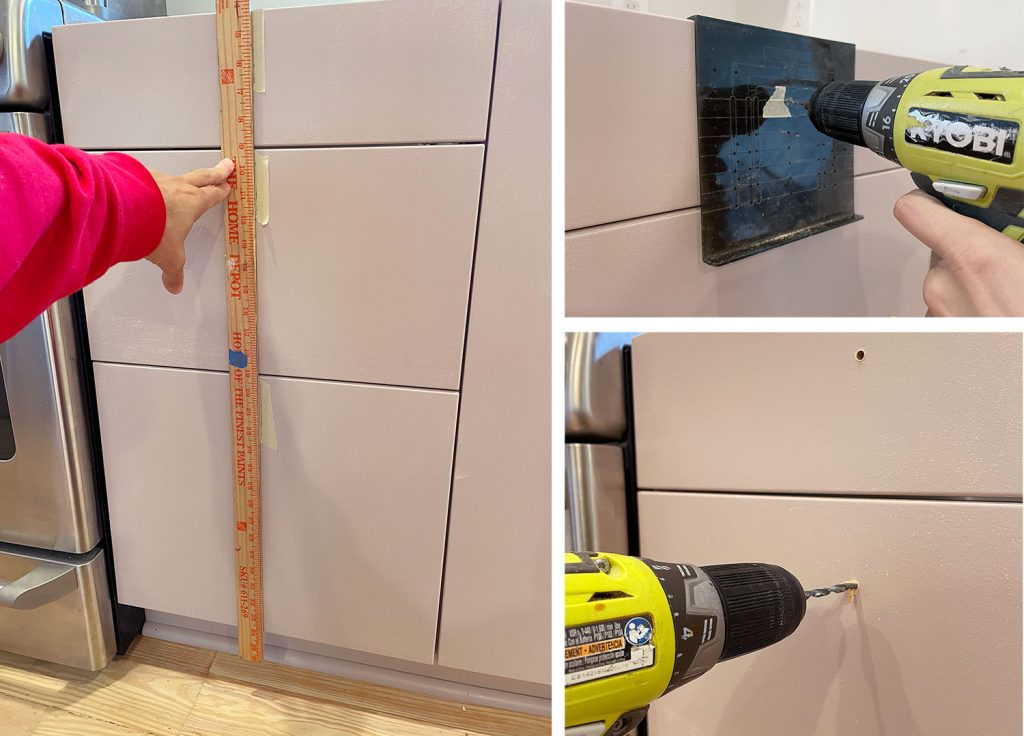
Plus, with our holes already made, we might actually let that second coat treatment and harden with none heavy manhandling instantly afterward, which might occur once you set up the {hardware}.
So whereas it’s definitely not essential to drill your {hardware} holes between your first and second coat of paint on the fronts, we discovered it to be a cheerful accident that we appreciated.
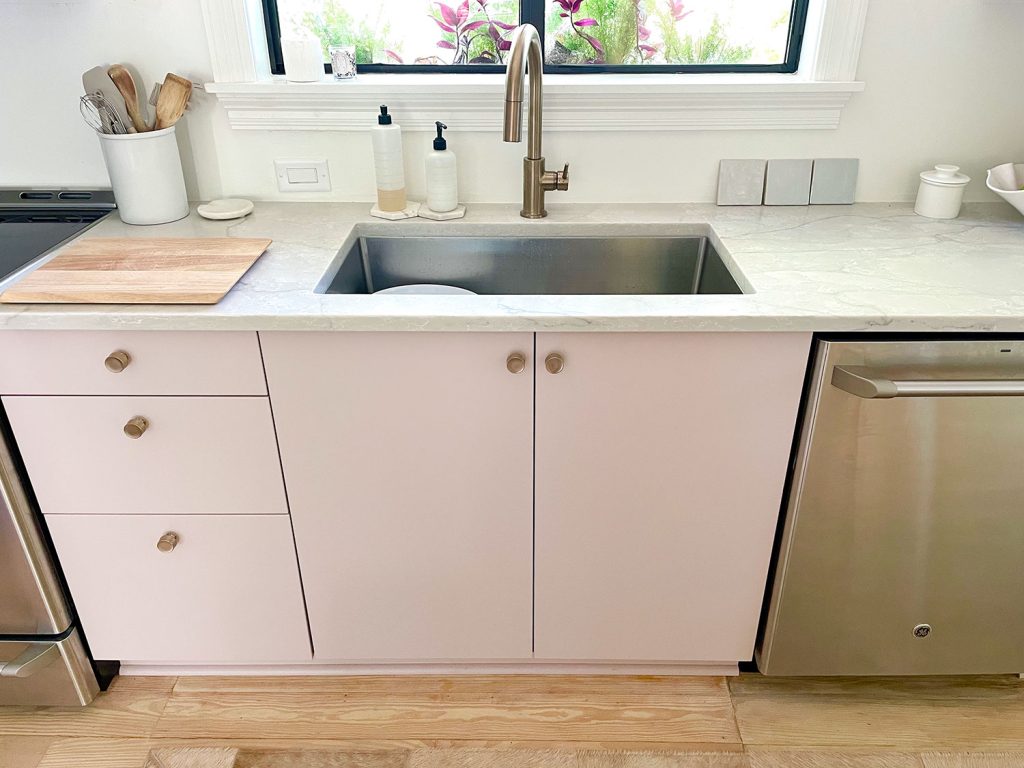
Step 9: Set up Every thing & Get pleasure from!
As delicately as we handled these painted cupboards the entire time we labored on them, they in a short time proved that they didn’t must be dealt with with any particular care in any respect. I don’t need to be too cocky since we’re solely a month into utilizing them, however thus far they’ve stood as much as bangs, kicks, spills, scrubbing, and plenty of use. Zero points. Once more, I repeat: don’t skim in your prep and let all the things not solely dry however absolutely treatment earlier than you beat it up. That’s actually the important thing to lasting end. It meant this kitchen took a couple of full week to come back collectively as an alternative of only a day or two of quick-and-dirty portray, however it’s so value it ultimately.
Step-By-Step Video
However earlier than I am going, as promised, here’s a rather more detailed and fewer Gen-Z-transition-heavy video that particulars the method of portray these cupboards. I’m glad we filmed this alongside the best way, as a result of typically a video is value a thousand photographs, and whereas a fast TikTok like mashup of footage makes all the things seem like it takes 5 minutes, you may actually see how doable this course of is on this video. It’s not quick however it’s very beginner-friendly.
Word: You’ll be able to watch this video on YouTube
We’ll hold everybody posted (and can replace this publish) as time goes on to see how they maintain up over months and years of day by day use. I doubt will probably be good, however no painted cupboards ever are anyway. The premium manufacturing facility painted white cupboards in our final home had dings and scratches throughout the pullout trash drawer a couple of yr into proudly owning them. No less than with these we will repair the end ourselves with only a recent coat of paint!
Oh and we felt so good about how this course of went that we determined to put in extra cupboards (hiya uppers! Goodbye open cabinets alongside that again wall! And it additionally means we will add a hidden vent hood over the range!). We’re nonetheless followers of open shelving (we have now that white shiny shelving system subsequent to our kitchen desk simply steps away) however we predict it’ll be the most effective of each worlds to have some higher cupboards too. And as for the method of portray them, we plan to do the very same factor that we detailed right here on this publish. Keep tuned for a publish filled with photographs after they’re accomplished!
And for those who’re excited about another portray initiatives, listed below are a number of oldies-but-goodies:
*This publish incorporates affiliate hyperlinks, so we could earn a small fee once you make a purchase order by means of hyperlinks on our web site at no extra price to you.


